Choosing the right camera for Micron-Level Defect Detection
Published on: Oct 29, 2024

Written by: Soumen das
How to choose the Right Camera for Micron-Level Defect Detection
In the era of precise manufacturing and quality control, detecting microscopic defects is essential, especially for industries producing highly sensitive and miniature components. Choosing the right camera system for micron-level defect detection is a nuanced process, as it requires an understanding of both the camera's technical specifications and the conditions under which it will operate. This guide will explore the key factors, camera specifications, and technologies to consider when selecting a camera for micron-level defect detection.
Understanding Micron-Level Defect Detection
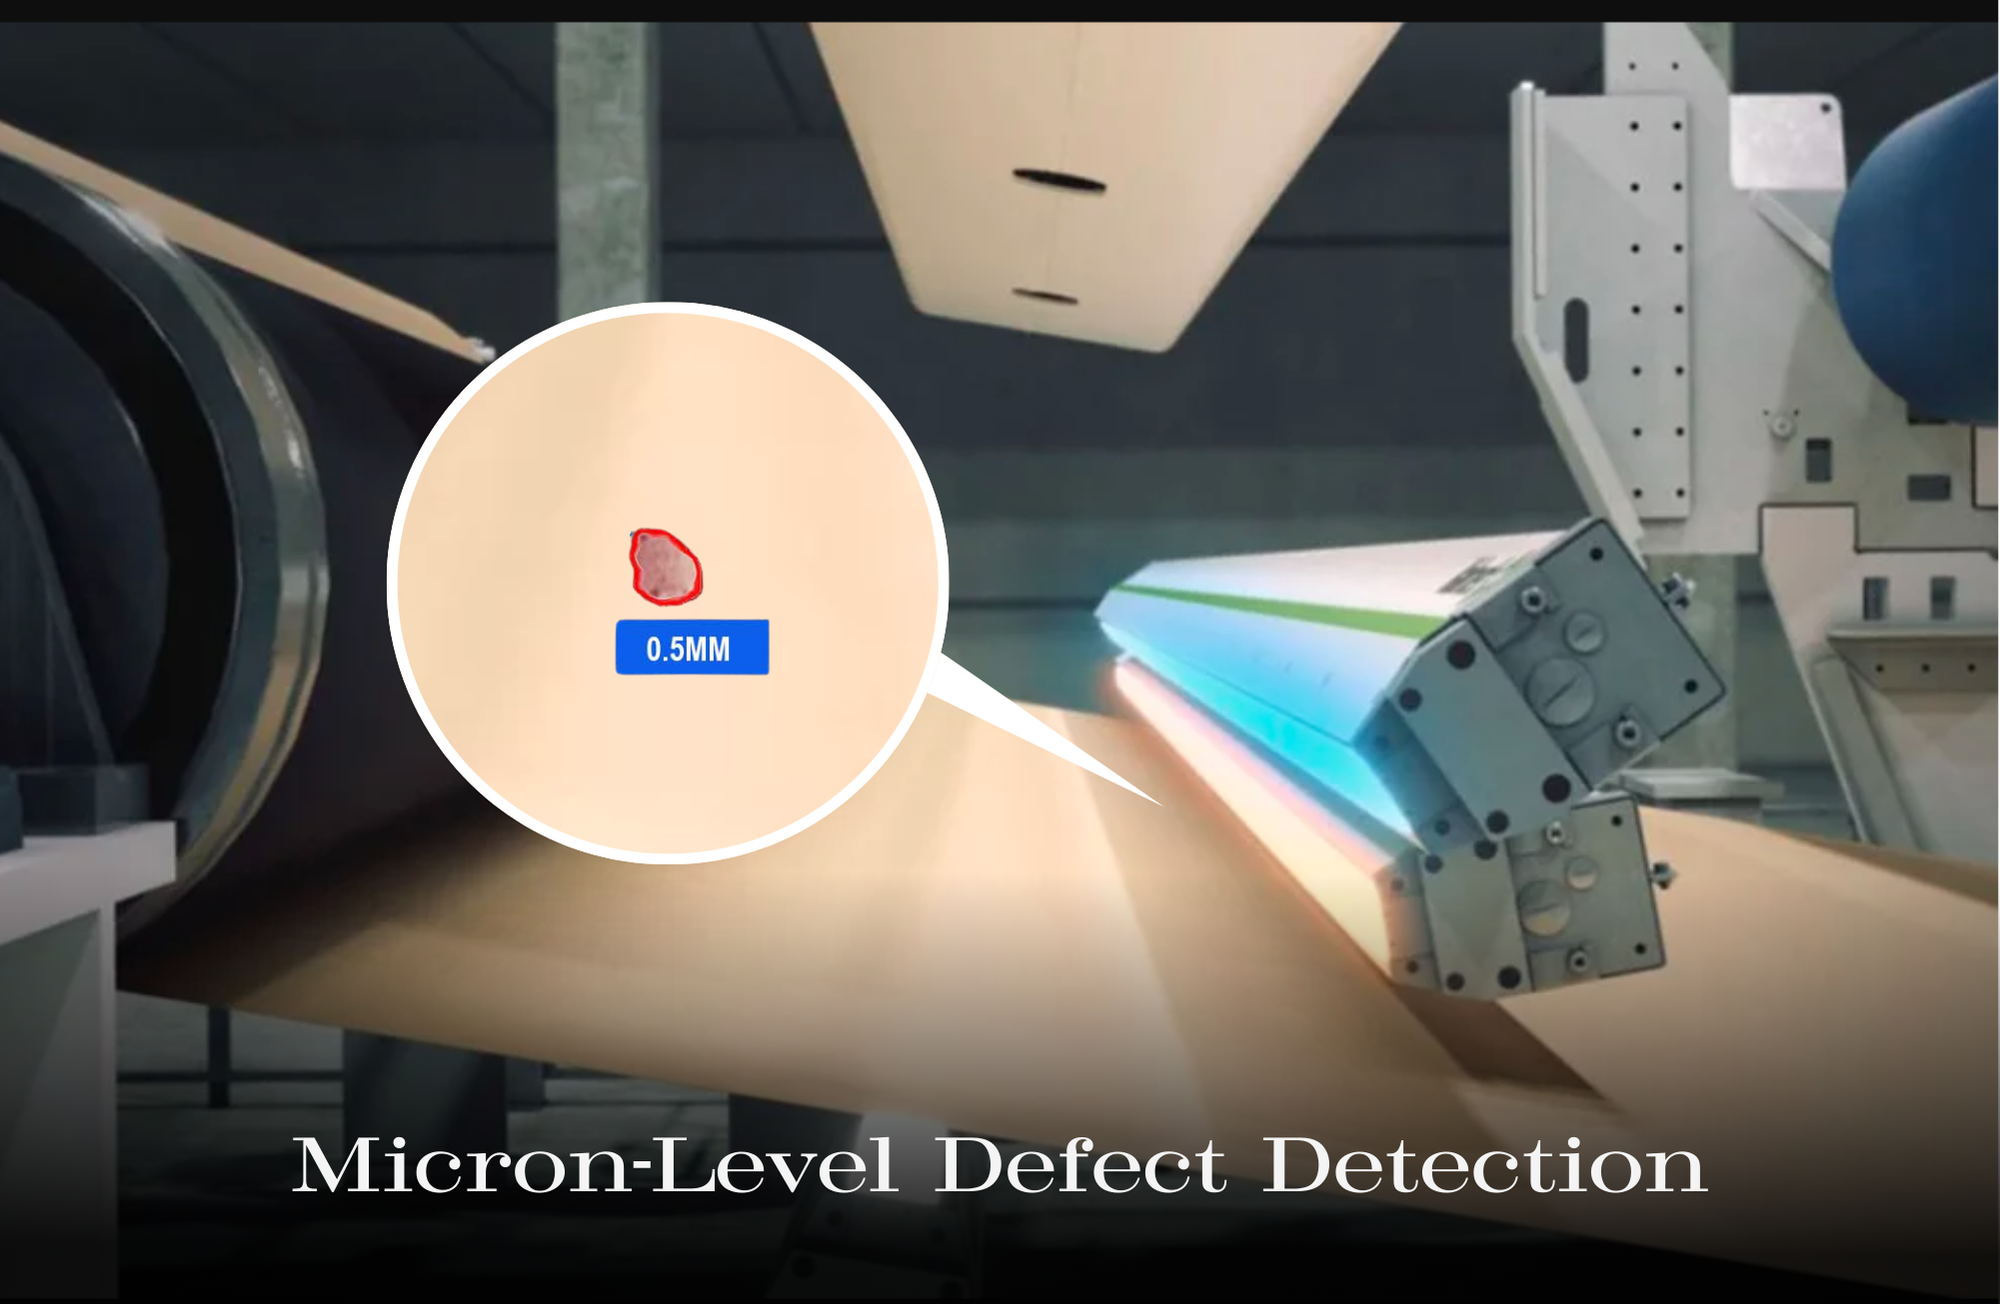
Micron-level defect detection involves capturing minute flaws or imperfections, often invisible to the human eye, with dimensions in the range of micrometers (µm). Industries such as semiconductor manufacturing, medical device production, electronics, and precision engineering demand exceptionally high levels of accuracy in defect detection. Common types of defects include surface scratches, foreign particles, material inconsistencies, and structural deformities.
Key Factors in Camera Selection
Micron-level defect detection imposes strict requirements on camera specifications, including resolution, sensor quality, and lens compatibility. Here are the main considerations:
Pixel Size and Resolution
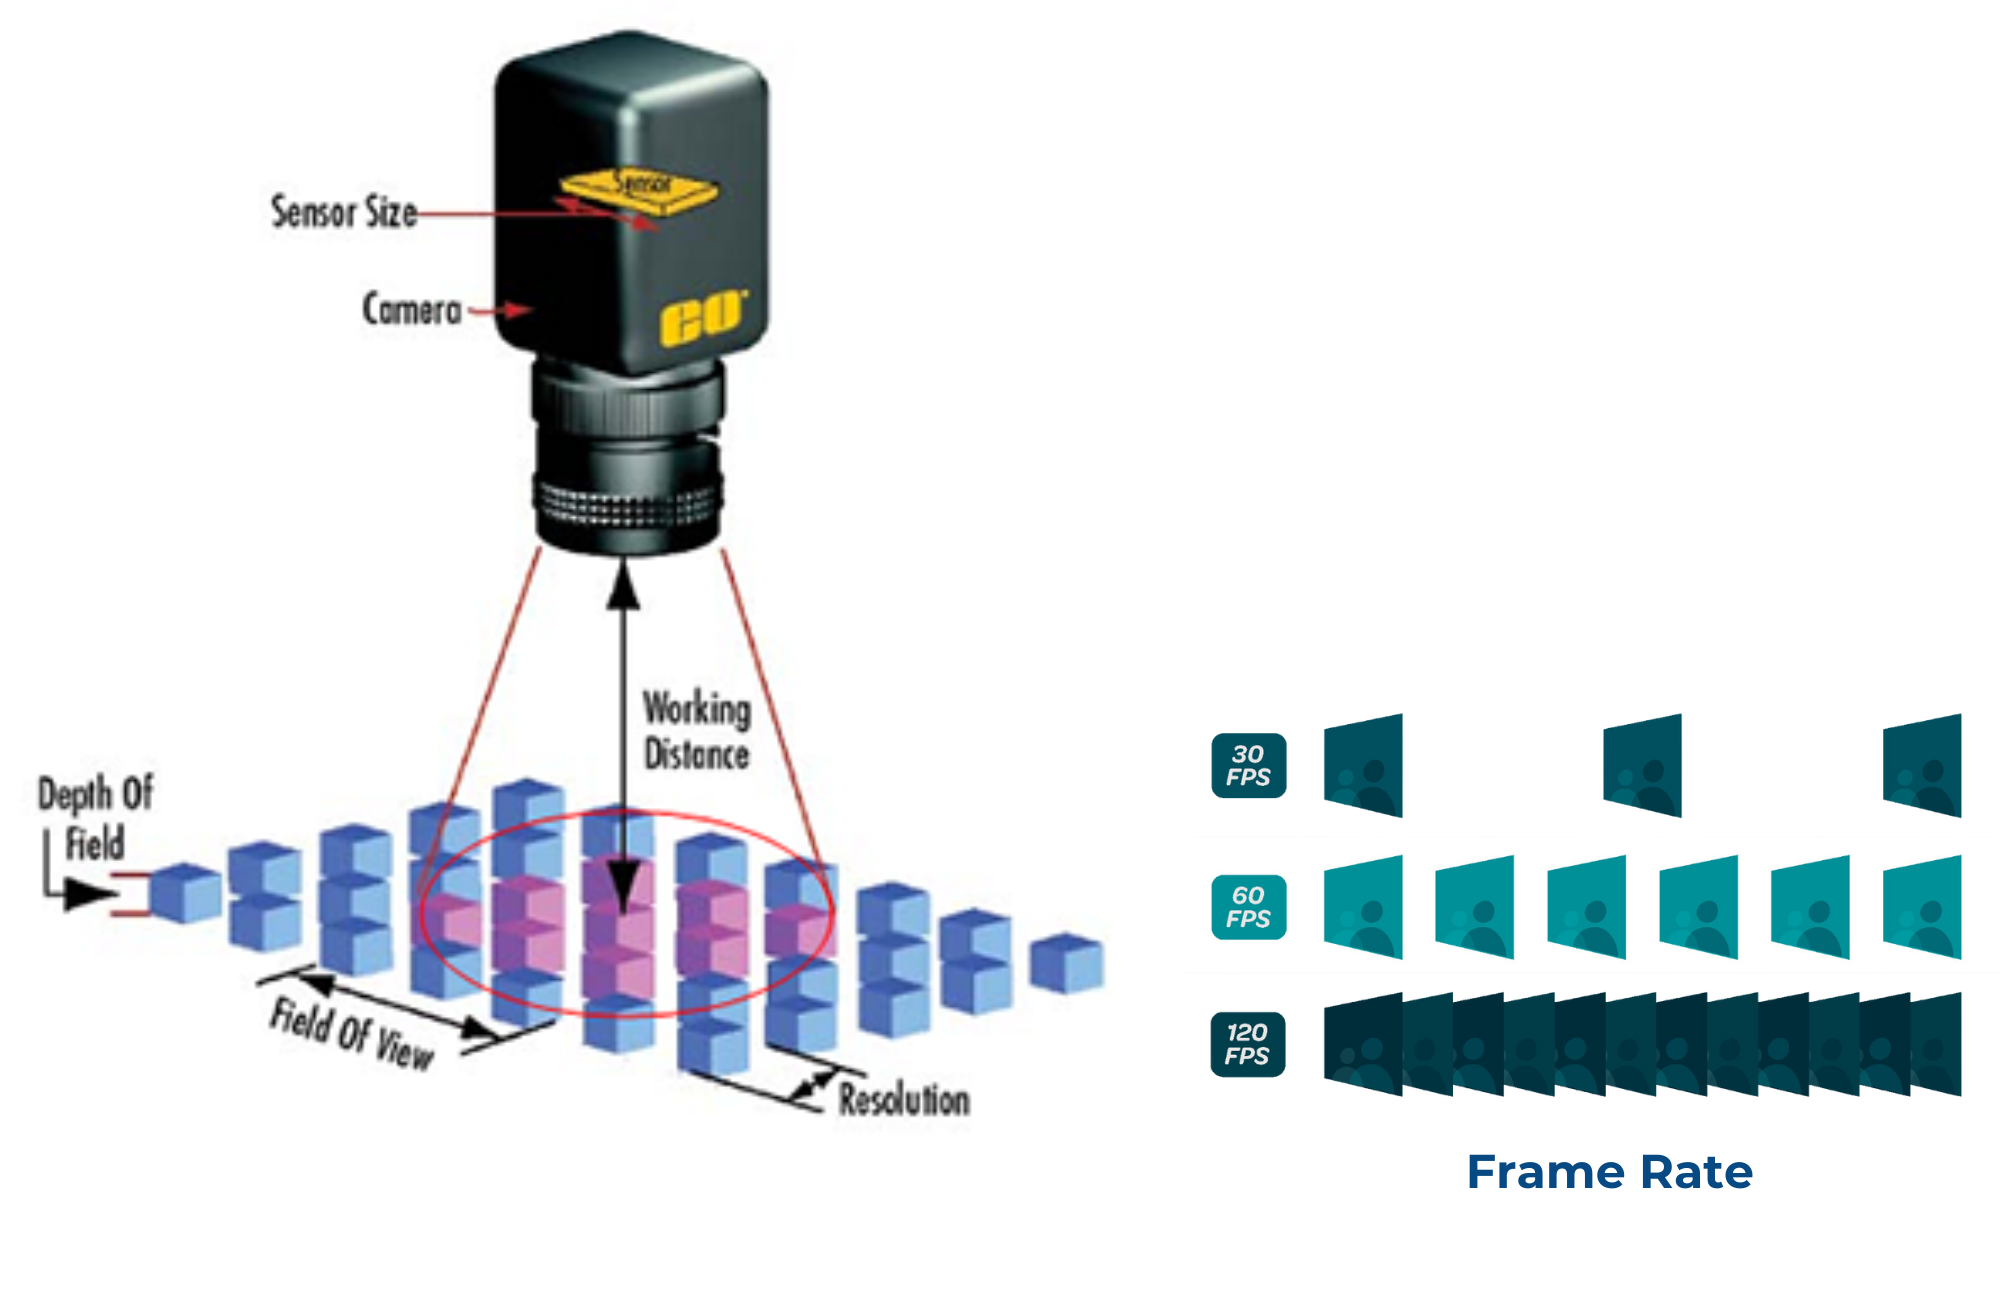
Pixel size and resolution are crucial in micron-level defect detection as they determine the smallest observable defect size. For our example:
Defect Size: 10µm
Desired Pixels per Defect: 3-4 pixels to ensure adequate detail
Required Pixel Size: This implies a pixel size of less than 3µm.
Given an FOV of 310mm x 310mm, the required camera resolution can be determined as follows:
Calculate Pixels per Dimension: Divide each FOV dimension by the target pixel size:
Resolution (pixels per dimension) = 310 mm / 0.003 mm (3µm) ≈ 103,333 pixels
This calculation suggests a camera resolution of approximately 103,333 x 103,333 pixels or around 10.7 gigapixels, a high standard for conventional imaging but essential for maintaining micron-level accuracy across a large FOV.
Field of View (FOV)
The FOV is the observable area captured by the camera. The right FOV balances coverage with defect visibility, ensuring that even the smallest defects are captured within the observable space. A narrow FOV with high resolution is typically preferred for micron-level inspection.
Depth of Field (DOF)
The DOF is critical in cases where the object surface isn’t perfectly flat. A deeper DOF allows more of the object to be in focus at the same time, enabling a clearer view of potential defects at varying depths on the object's surface.
Lighting and Illumination
Proper lighting, often in the form of structured, coaxial, or ring lighting, is essential for micron-level defect detection. It enhances contrast, highlighting defects that may otherwise blend into the object’s surface.
Frame Rate
In high-speed production environments, frame rate becomes critical. Higher frame rates allow cameras to capture images without motion blur, even at fast-moving speeds, ensuring that defects are detected accurately without slowing down production.
Camera Sensor and Resolution
For high-precision applications, selecting the right sensor type and resolution is key. Common sensor technologies include:
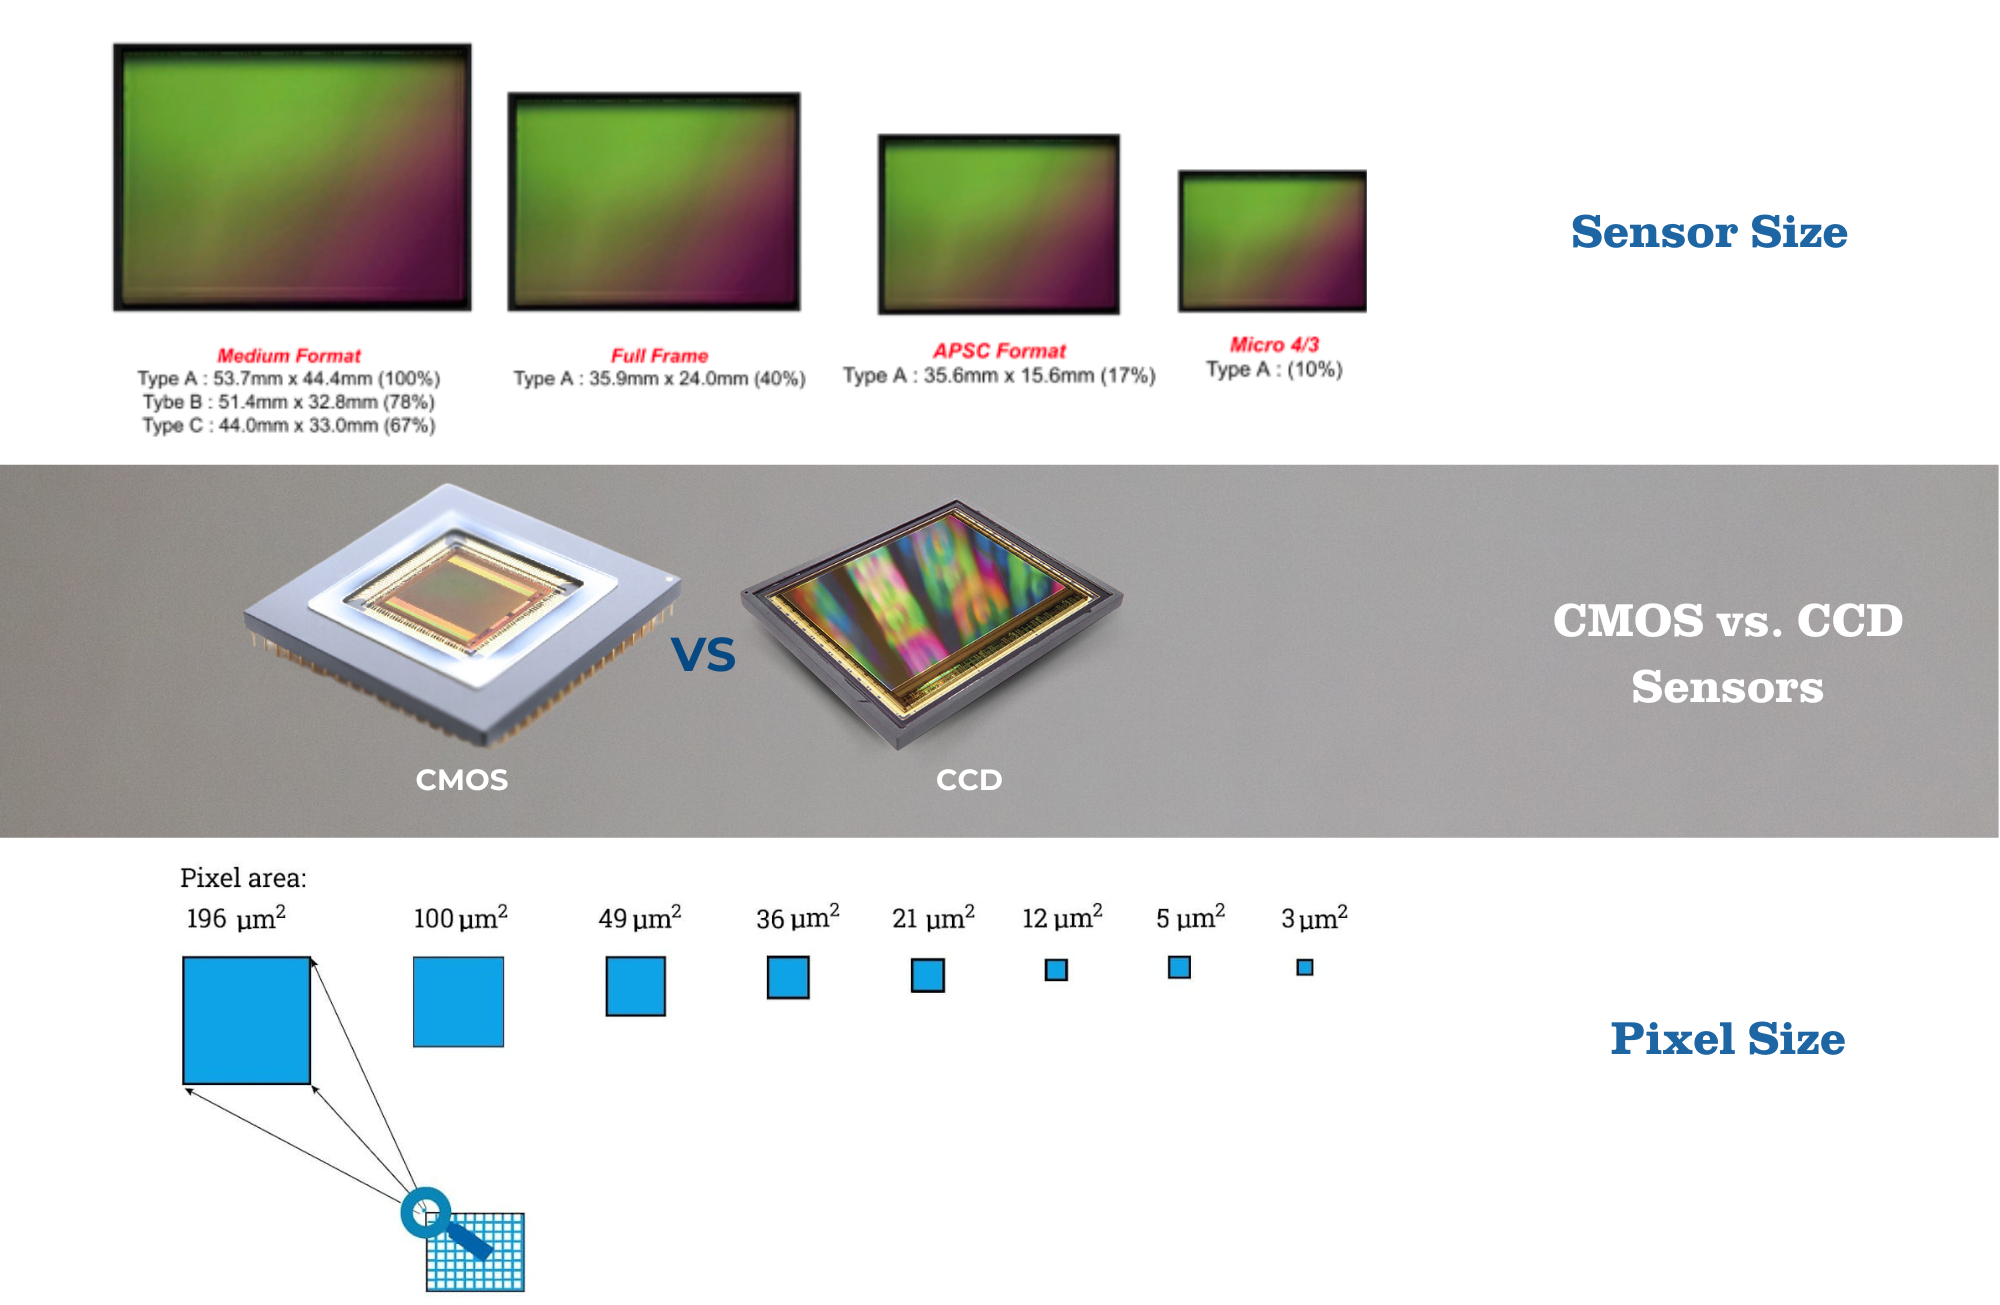
- CMOS vs. CCD Sensors: While CCD sensors traditionally offered higher image quality with low noise, modern CMOS sensors provide high frame rates, improved sensitivity, and dynamic range, making them suitable for fast, high-resolution imaging.
- Sensor Size: Larger sensors capture more light, improving image clarity, especially in low-light environments. However, sensor size must be matched with lens magnification to avoid distortion or vignetting, which can compromise defect visibility.
- Pixel Size: Smaller pixels provide higher resolution within a given sensor size, essential for detecting tiny defects. However, small pixel sizes can reduce sensitivity to light, so a balance must be struck based on the available lighting conditions.
Lens Selection and Magnification
The lens magnification and working distance have a significant impact on defect detection:
- Working Distance: The optimal working distance between the camera and the object should allow the camera to capture the entire object in the FOV while maintaining clarity at the micron level. Working distance is often dictated by lens selection, with specialized lenses available for close-up or macro imaging.
- Magnification: Achieving sufficient magnification is essential for micron-level detection. For example, a 5x or 10x magnification may be necessary depending on defect size and required clarity. Telecentric lenses are often recommended because they minimize perspective distortions, ensuring accurate measurements of defects.
- Depth of Field vs. Magnification: A higher magnification typically reduces the DOF, which can make it challenging to keep the entire object in focus. Balancing magnification and DOF is critical, especially for objects with non-uniform surfaces.
Types of Cameras for Micron-Level Defect Detection
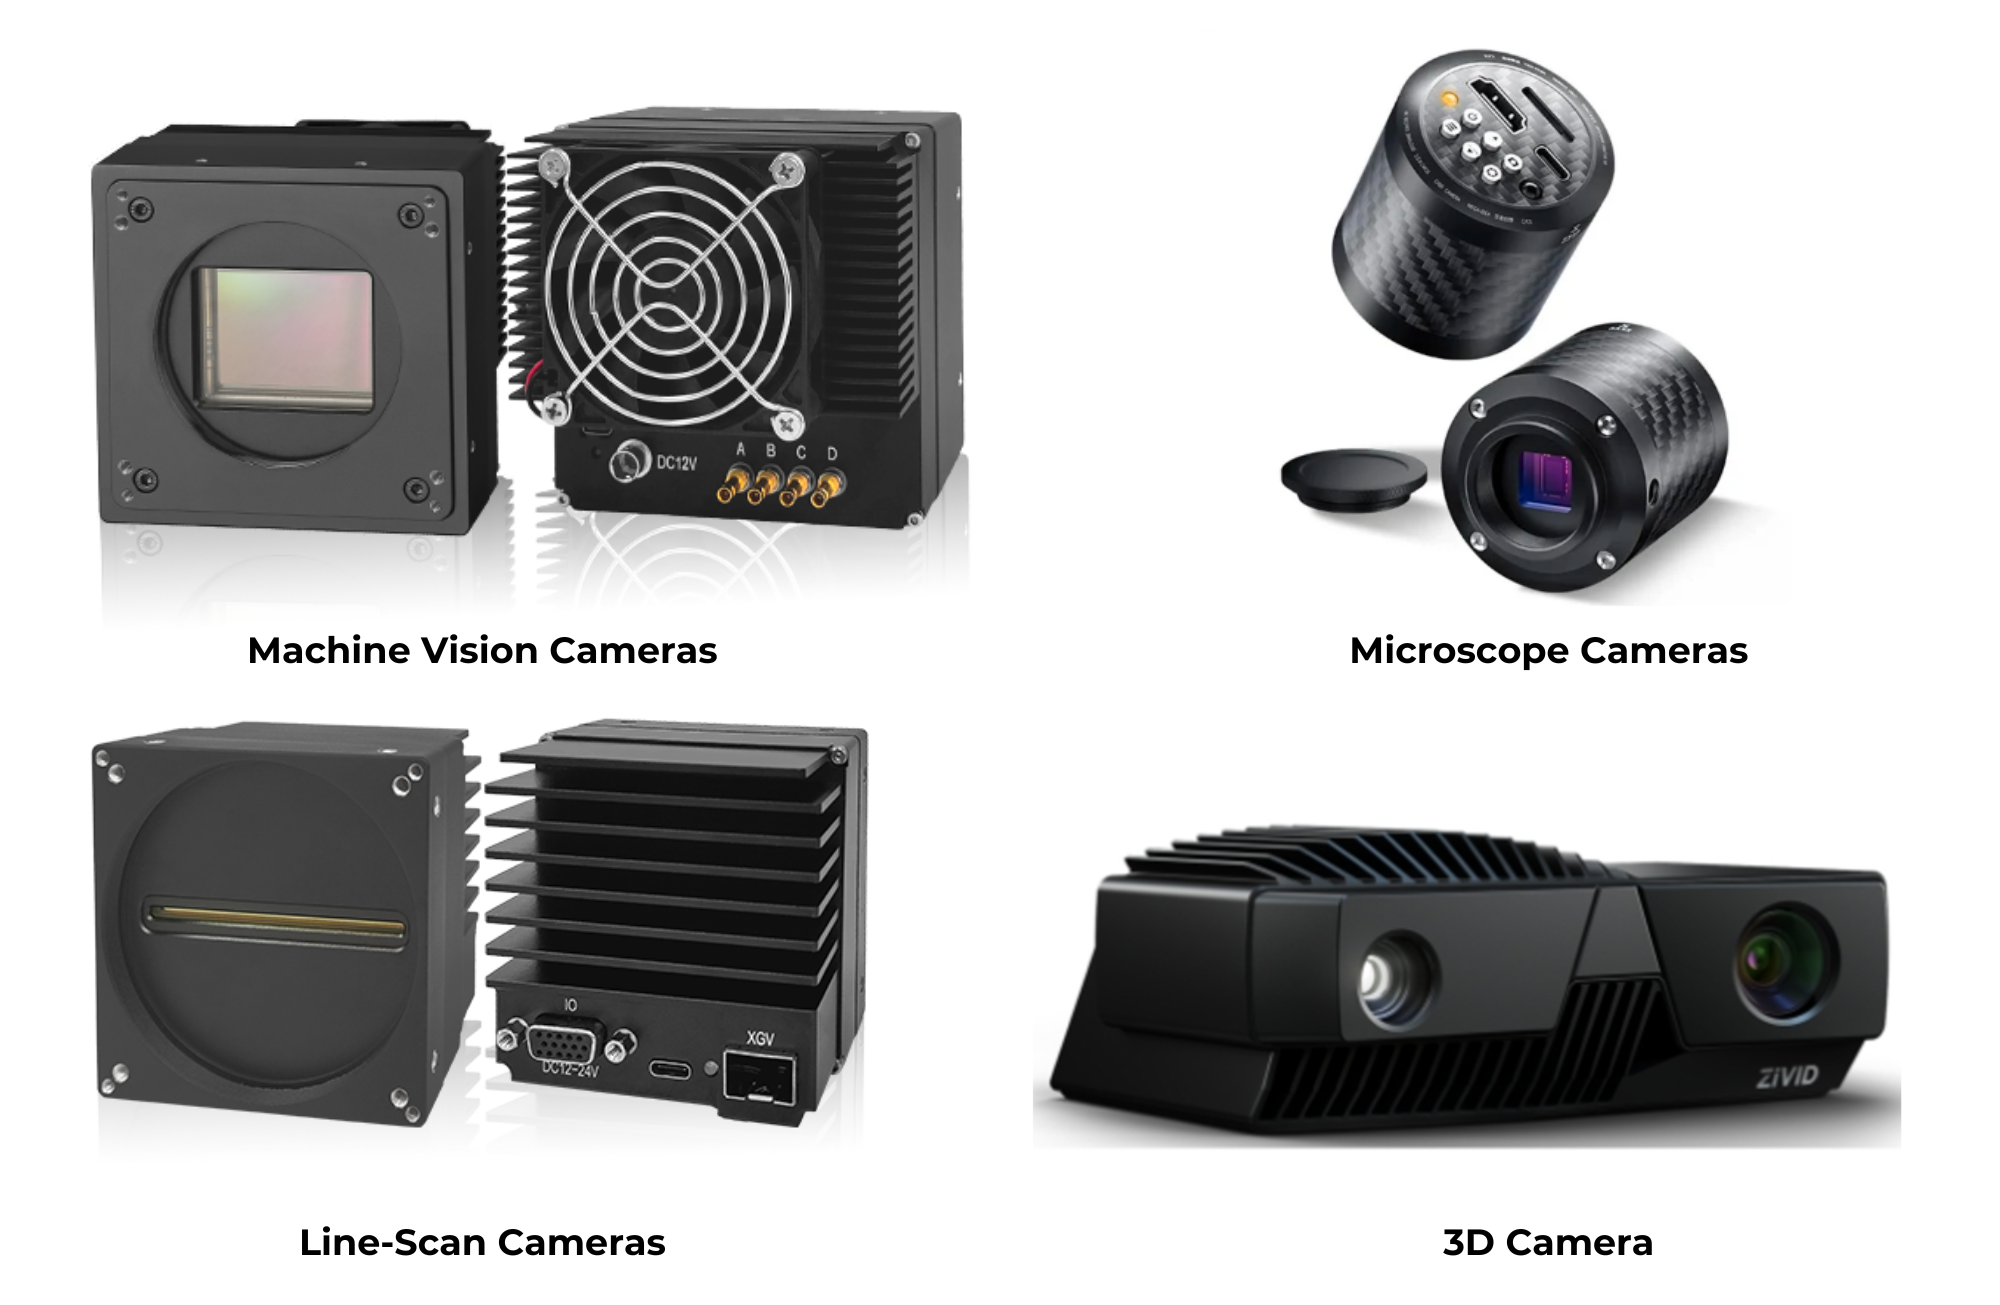
Various types of cameras are used in micron-level defect detection, each suited to specific needs:
- Machine Vision Cameras: Standard in industrial applications, these cameras offer high frame rates, synchronization options, and flexible software integration, which are essential for automated inspection systems.
- Microscope Cameras: Often used for extreme close-ups, microscope cameras capture high-resolution images at high magnification levels. These cameras are ideal for static inspections of very small areas but may not be suitable for high-speed production.
- Line-Scan Cameras: For inspecting cylindrical or continuous materials (e.g., textiles, films, or wires), line-scan cameras capture one line at a time, constructing a high-resolution image line by line as the object moves past the camera.
- 3D Cameras: In applications where surface topography plays a role in defect identification, 3D cameras capture depth information, providing detailed views of defects that have height variations.
Sensor Calibration and Software Considerations
For optimal results, sensor calibration and software play significant roles in defect detection:
- Calibration: Regular calibration ensures accurate image representation, essential for consistent defect detection. Calibration helps correct optical distortions, color inaccuracies, and misalignments that can affect defect measurements.
- Software: The camera software, often part of machine vision systems, provides tools for image processing, defect detection, and data analysis. Advanced algorithms, such as edge detection, blob analysis, and pattern matching, help automate defect identification and classification.
Environmental Considerations
The environment where the camera is deployed can influence its performance. Factors like vibration, temperature, and dust can impact camera stability and image quality. Industrial-grade cameras with robust enclosures are recommended for harsh environments. Environmental considerations should also extend to lighting; for instance, some cameras may require additional filters or housings to handle fluctuations in ambient light.
Choosing a Camera Based on Application Requirements
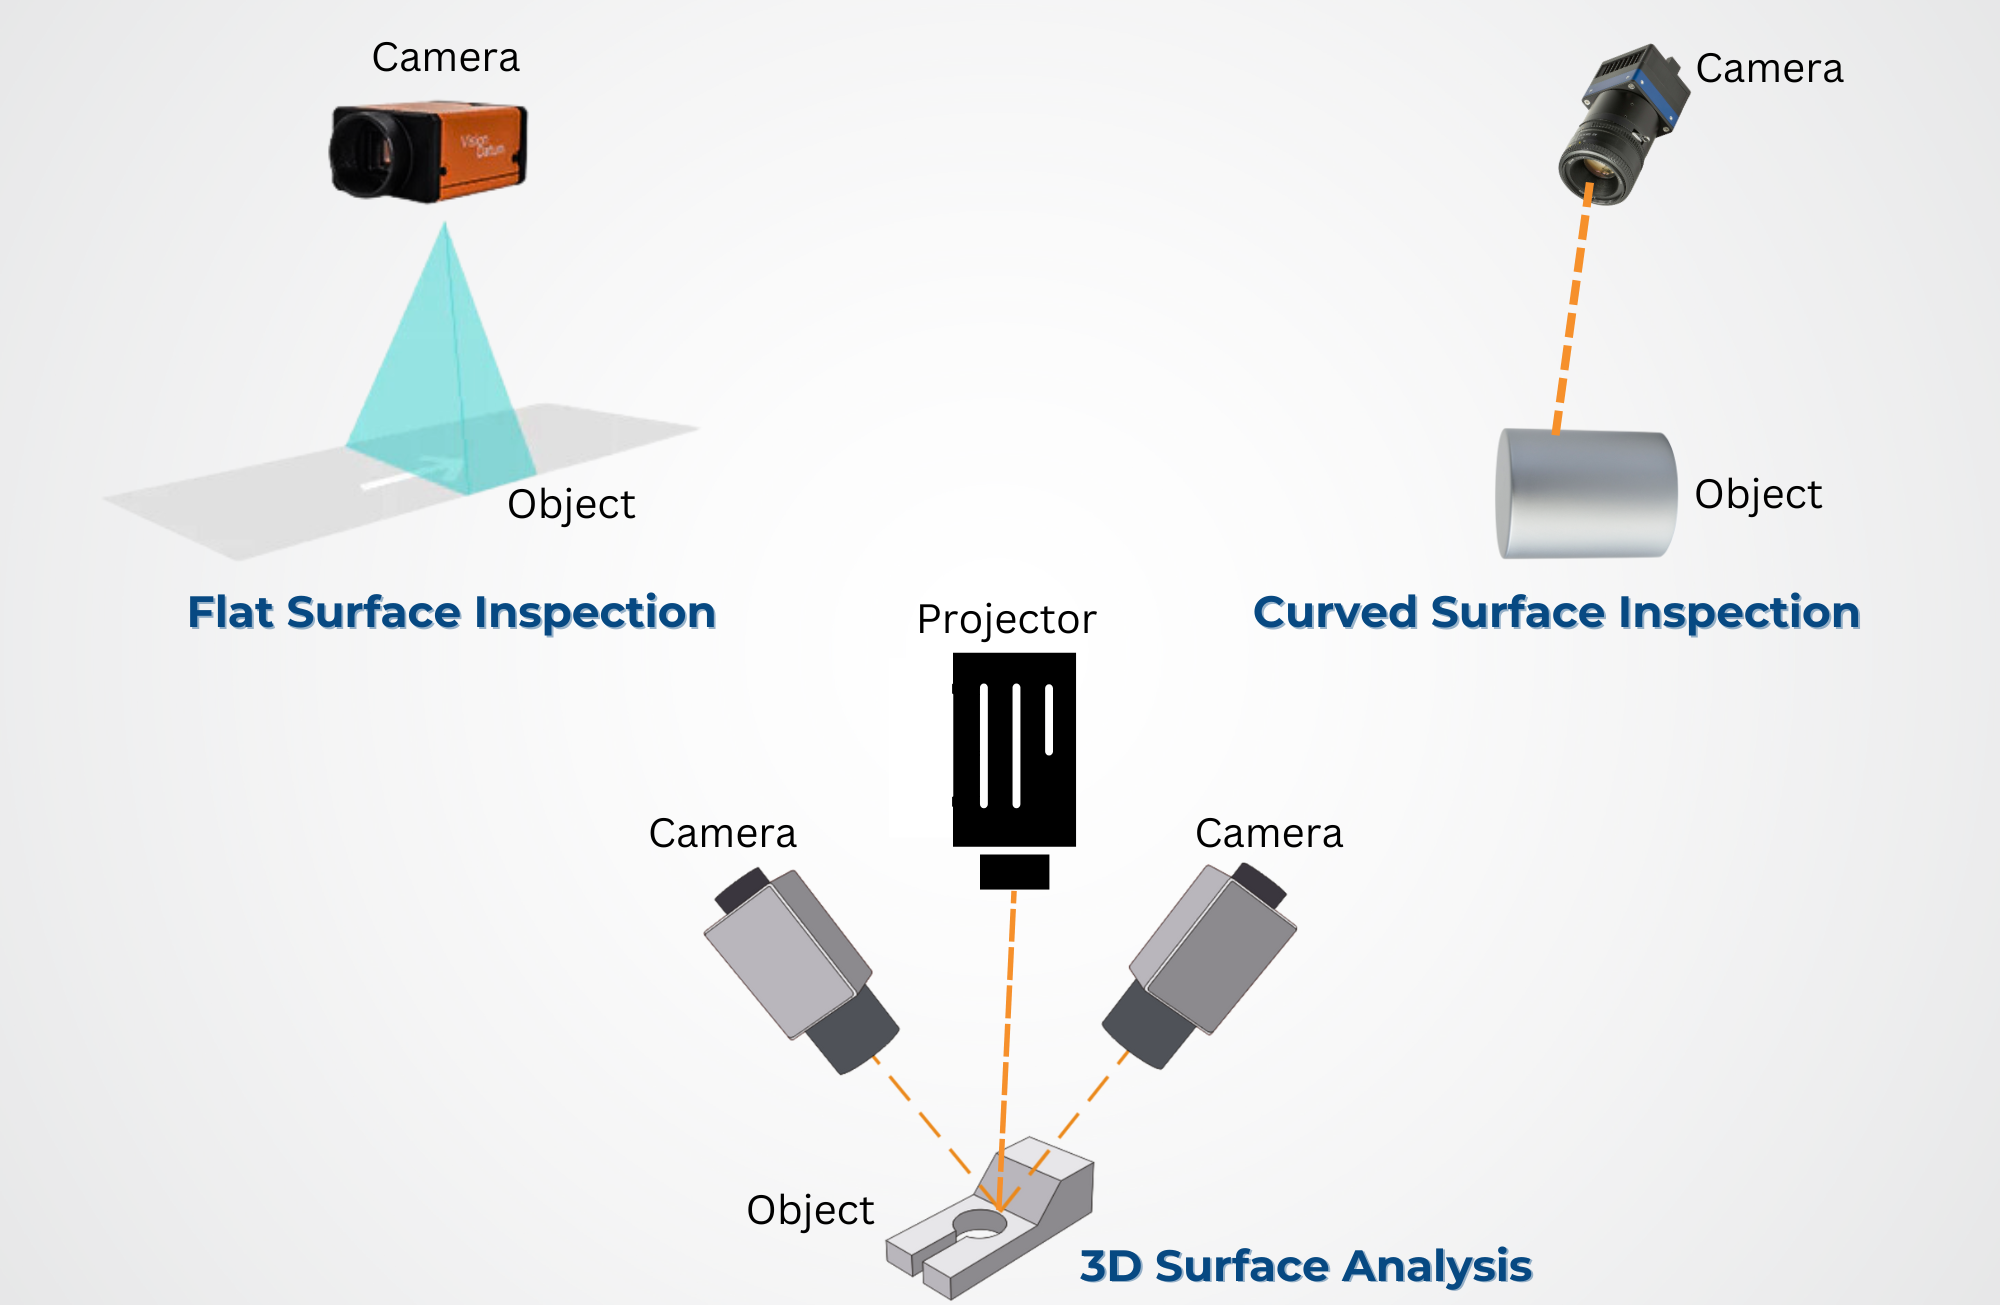
Different applications demand unique camera specifications:
- Flat Surface Inspection: For industries such as glass or flat metal, high-resolution area-scan cameras with appropriate lighting (e.g., dark field) highlight surface defects like scratches and pits.
- Curved Surface Inspection: For objects like cylinders or wires, line-scan cameras are suitable, as they can capture the entire surface with high clarity, detecting scratches and material inconsistencies.
- 3D Surface Analysis: Some applications, like inspecting complex 3D shapes, benefit from 3D imaging. Structured light or stereo vision cameras can be used to create a 3D surface model and detect defects with height variance.
Cost-Benefit Analysis
Selecting a camera for micron-level defect detection is often a significant investment. Consider the following factors:
- Cost of Camera and Lenses: High-resolution cameras and specialized lenses, such as telecentric lenses, come with a higher price tag but yield superior image quality for precise inspections.
- Maintenance and Calibration: Advanced cameras require regular calibration and maintenance to ensure continued accuracy, which adds to the long-term cost.
- Integration with Existing Systems: Ensure compatibility with existing manufacturing or inspection systems, as this can avoid additional costs related to system modifications or software integration.
A Holistic Approach to Camera Selection
Choosing the right camera for micron-level defect detection requires a thorough understanding of the camera’s technical specifications, the inspection environment, and the type of defects to be identified. High-resolution sensors, suitable lenses with precise magnification, and appropriate lighting are foundational to successful micron-level defect detection. Furthermore, calibration and software integration ensure that the system operates accurately and efficiently. By carefully considering these factors, industries can enhance their quality control processes, reduce product defects, and ensure that their final products meet stringent quality standards.
