What is Coordinate Measurements? Application in Contact and Non-Contact Measurement
Published on: Sep 30, 2024

Written by: Admin
What is Coordinate Measurements?
Coordinate measurement is the process of determining the exact position of various points, features, or surfaces on a part or object in three-dimensional space. The purpose of coordinate measurement is to ensure that a part's physical dimensions—such as length, width, height, depth, and angular relationships—conform to design specifications.
This type of measurement is typically used in manufacturing for quality control, ensuring that parts meet geometric dimensioning and tolerancing (GD&T) standards. GD&T defines allowable variations in size, shape, and positional accuracy for a part, which coordinate measurements help verify.
How Coordinate Measurement Works?
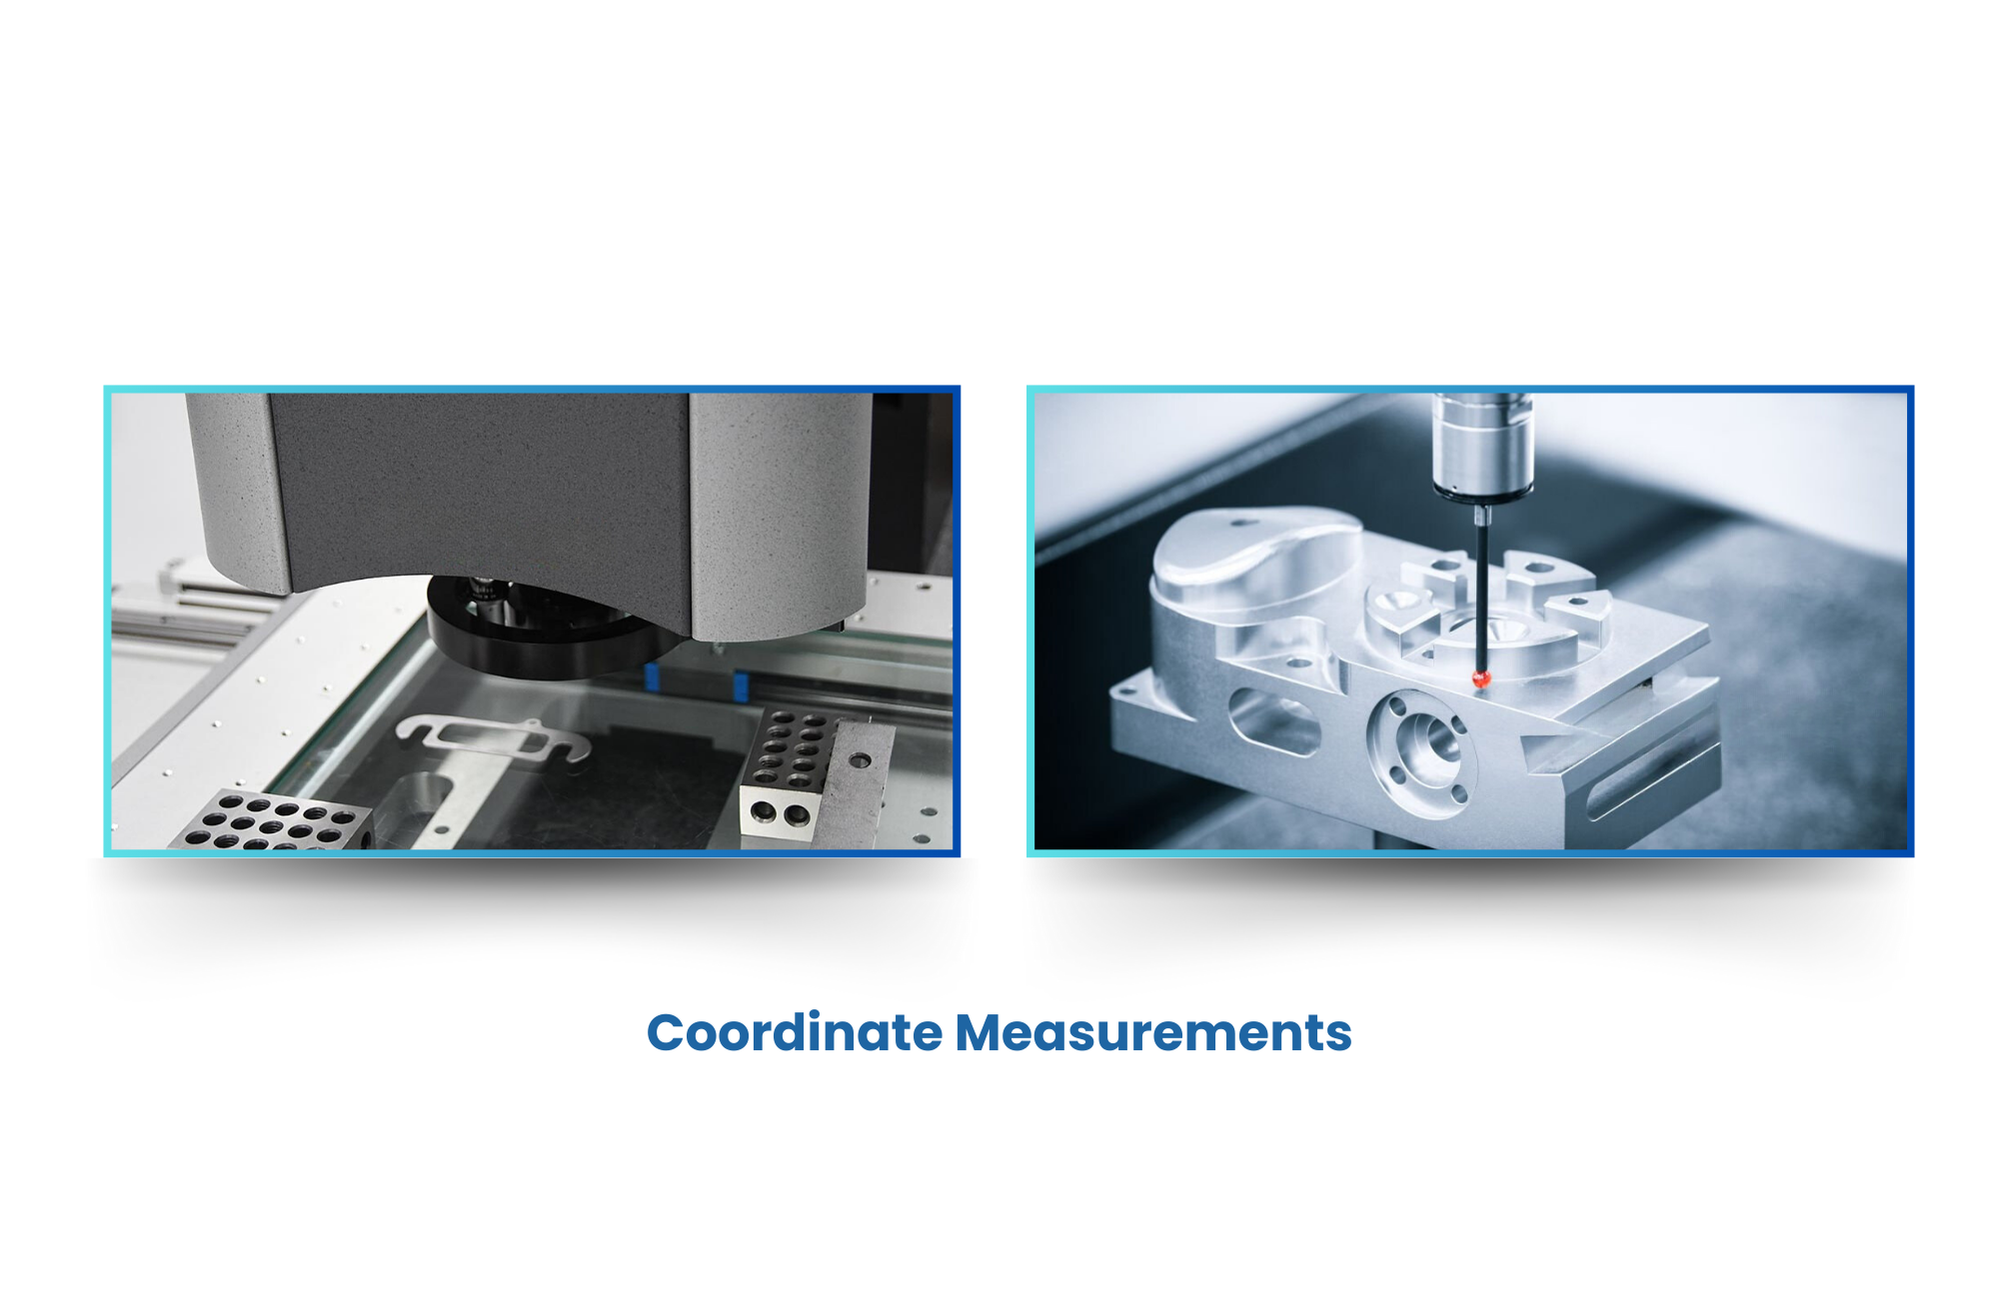
Coordinate measurements rely on a system of reference points—usually an X, Y, and Z axis—that form a coordinate plane. The measurement process involves determining the location of specific points or features relative to these axes. Modern coordinate measurement systems use advanced techniques, including sensors, probes, and cameras, to measure these points with high accuracy.
This process can be performed using both contact and non-contact measurement methods
Contact Coordinate Measurement
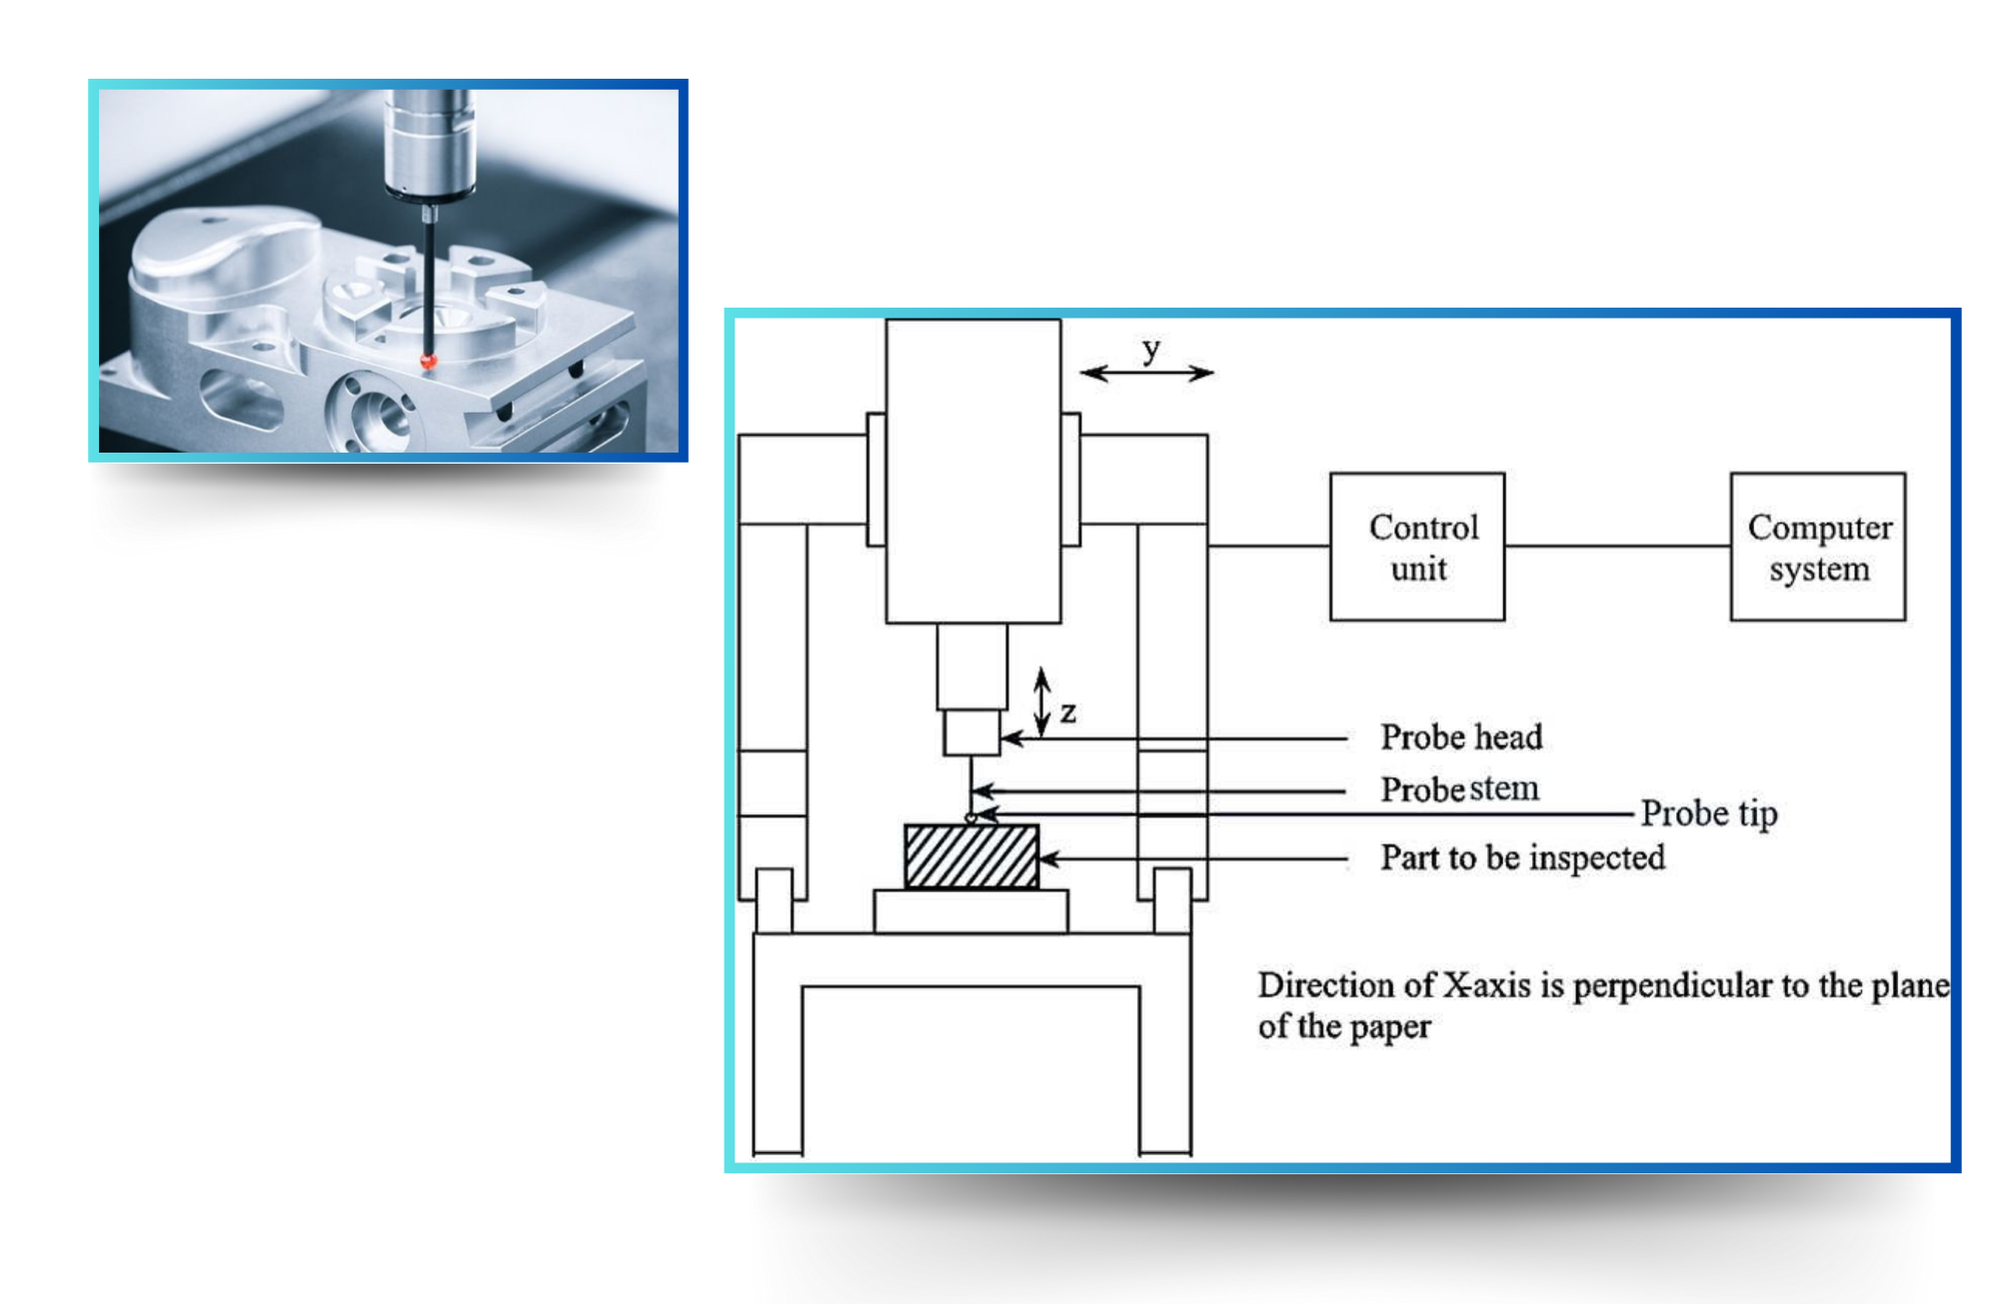
Contact coordinate measurement involves physically touching the part to record specific coordinates. A Coordinate Measuring Machine (CMM) is the most common tool used for contact-based coordinate measurements. CMMs use a tactile probe that physically touches the surface of a part to measure specific points.
How It Works:
- A CMM consists of a movable probe mounted on a precision frame.
- The operator or automated system moves the probe to various points on the surface of the part.
- As the probe touches the part, the machine records the coordinates of each point.
- By gathering multiple points, the system can create a complete 3D model of the part and compare it to the CAD design.
- CMMs can measure simple dimensions like length and diameter, as well as more complex features like angles and surface profiles.
Use Cases for Contact Coordinate Measurement:
- Automotive Components: Measuring the exact position of features like holes, slots, and complex curves on engine parts, gears, and transmission components.
- Aerospace: Ensuring the precise alignment of critical components such as turbine blades, landing gear, and fuselage sections, where even minor deviations can affect performance and safety.
- Metal Fabrication: Verifying the dimensional accuracy of machined or cast metal parts, including their hole patterns, thickness, and surface angles.
Advantages of Contact Coordinate Measurement:
- High Accuracy: CMMs offer exceptional precision, often down to the micron level.
- Suitable for Complex Parts: Ideal for complex geometries, high-tolerance parts, and parts requiring exact position measurements.
- Reliable for Surface Roughness: CMMs can also measure surface roughness and micro-textures, which are difficult for non-contact methods.
Disadvantages of Contact Coordinate Measurement:
- Slow Process: Contact measurement requires the probe to physically touch the part, which can be time-consuming, especially for large or intricate parts.
- Risk of Damage: The probe may cause minor surface scratches, especially on delicate materials.
- Limited to Rigid Parts: Soft or flexible materials may deform under the pressure of the probe, leading to inaccurate results.
Non-Contact Coordinate Measurement
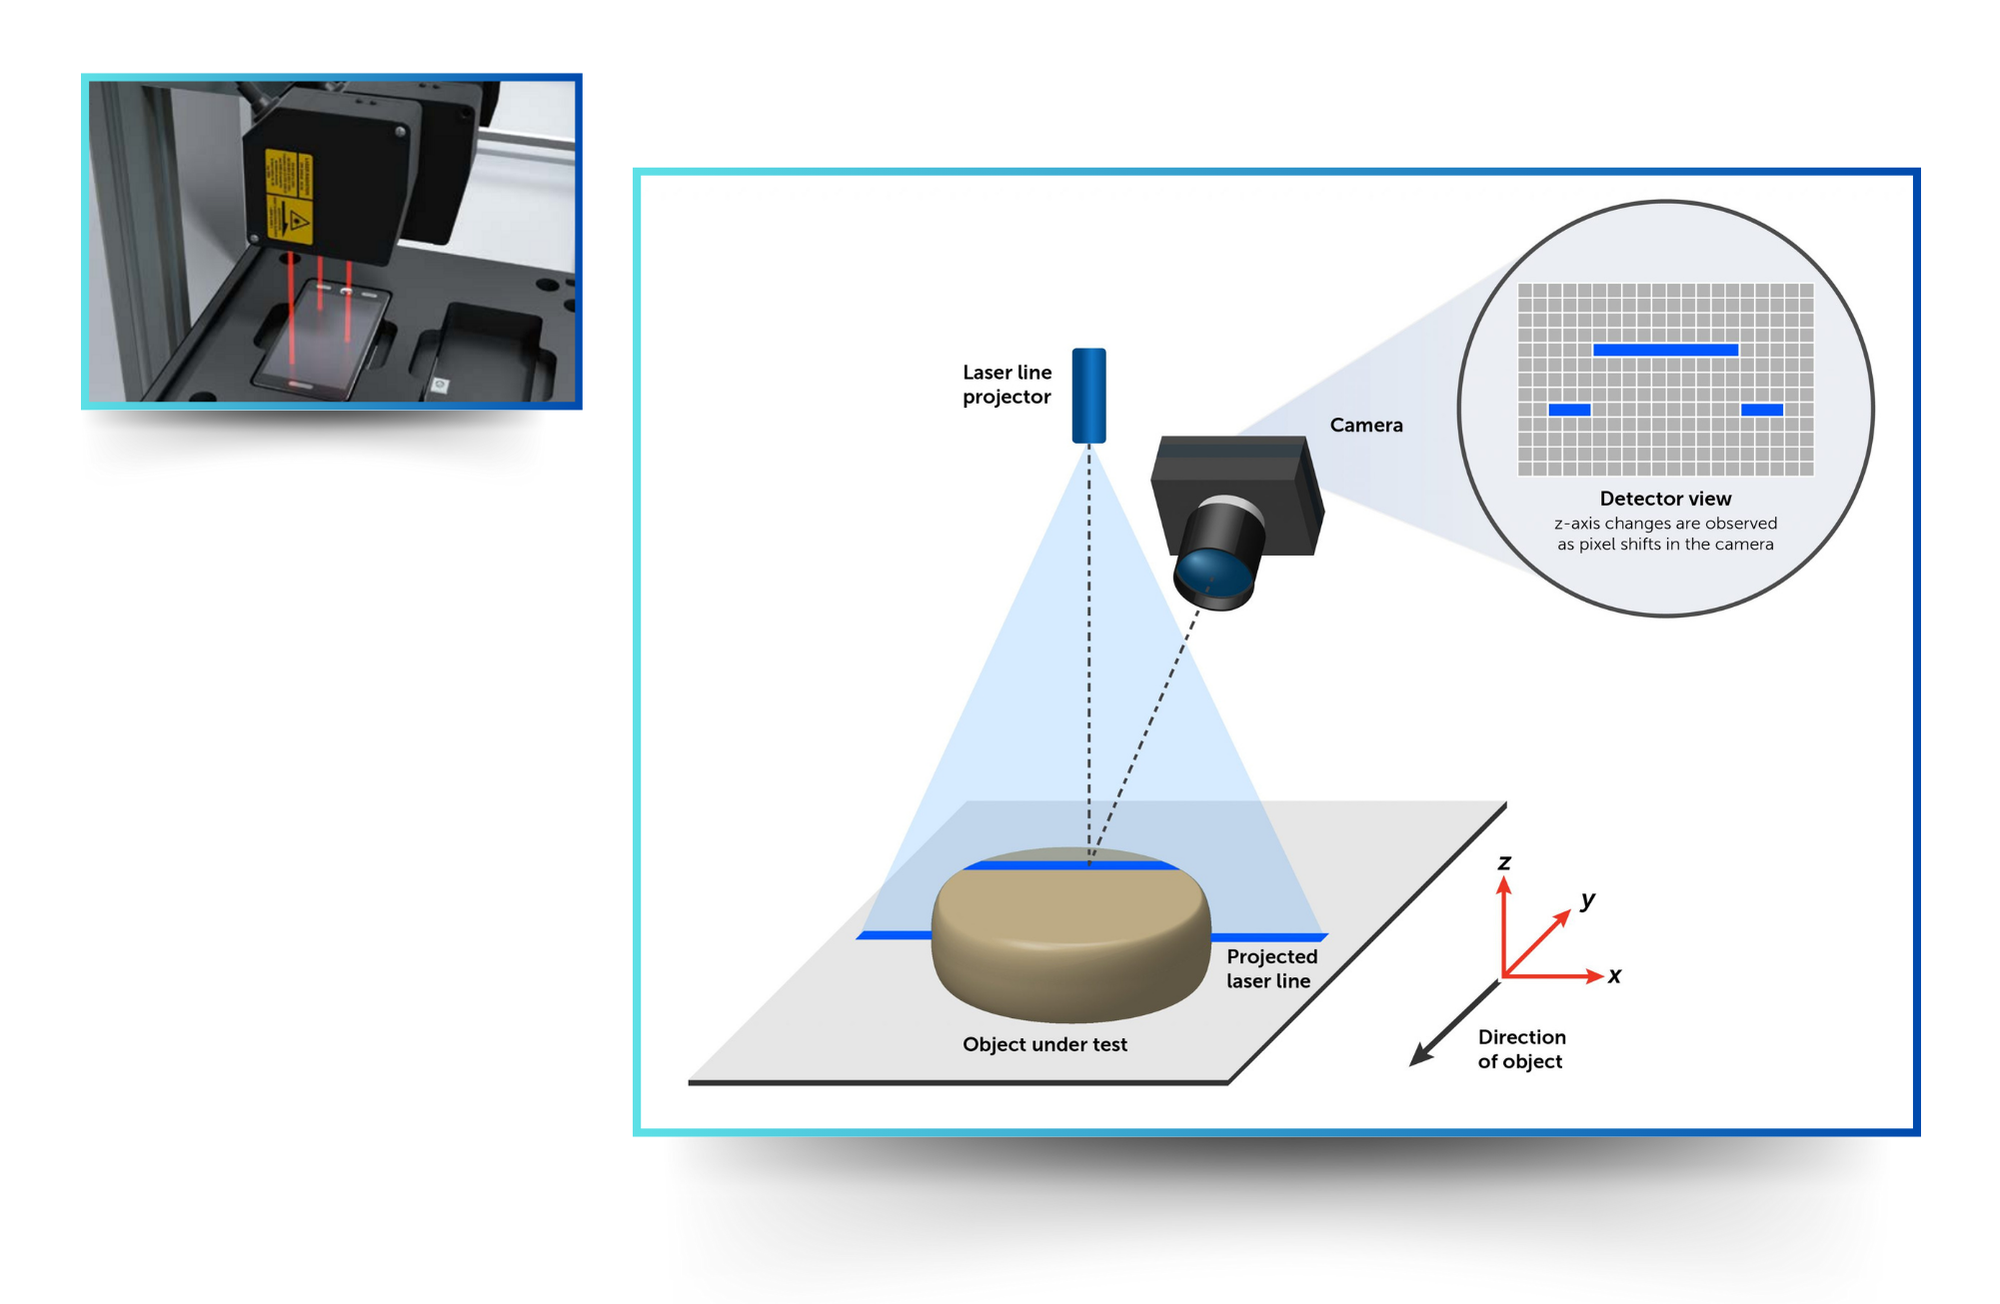
Non-contact coordinate measurement involves using optical or laser-based systems to capture 3D coordinates without physically touching the part. These systems typically use machine vision or laser scanners to map the surface of an object and calculate the exact coordinates of various features.
How It Works:
- Non-contact systems, such as 3D laser scanners or structured light scanners, project a light pattern (laser, structured light, or similar) onto the surface of the object.
- Cameras or sensors capture the reflected light to measure the position of key features and points on the part.
- The system then calculates the 3D coordinates of these points in relation to a reference axis.
- Advanced software processes the captured data to create a 3D model of the object, which can be compared to the original CAD design for quality control.
- These systems can quickly gather a large number of data points, making them ideal for parts with complex surfaces and curves.
Use Cases for Non-Contact Coordinate Measurement:
- Electronics: Measuring the positions of connectors, pins, and components on a printed circuit board (PCB) without damaging the sensitive elements.
- Medical Devices: Inspecting the dimensions of delicate implants, stents, and surgical tools, where contact could cause contamination or damage.
- Plastics and Rubber: Verifying the dimensions of soft materials like rubber seals, plastic containers, and other flexible parts where contact methods may not be feasible.
- Aerospace and Automotive: Measuring complex, large-scale parts such as fuselage panels, turbine blades, or vehicle body panels, where high-speed scanning and non-contact methods reduce the risk of damage and provide comprehensive surface data.
Advantages of Non-Contact Coordinate Measurement:
- Fast and Efficient: Non-contact systems can measure many points in a fraction of the time required by contact methods, making them ideal for high-speed production environments.
- No Risk of Damage: Non-contact systems do not physically interact with the part, ensuring that fragile or delicate components are not scratched, deformed, or damaged.
- Complex Geometries: These systems excel at measuring parts with complex shapes, curves, and hard-to-reach areas that are challenging for contact probes.
- Automation and Integration: Non-contact systems can be fully automated and integrated directly into production lines for real-time inspection.
Disadvantages of Non-Contact Coordinate Measurement:
- Sensitivity to Environmental Conditions: Non-contact systems can be affected by lighting, surface reflectivity, and environmental factors, which may require additional calibration or setup.
- Initial Cost: Non-contact systems tend to have a higher upfront cost due to the advanced technology involved.
- Challenges with Surface Roughness: Non-contact systems may not be as effective for measuring surface roughness or fine textures as tactile probes.
Contact vs. Non-Contact Coordinate Measurement: Which to Choose?
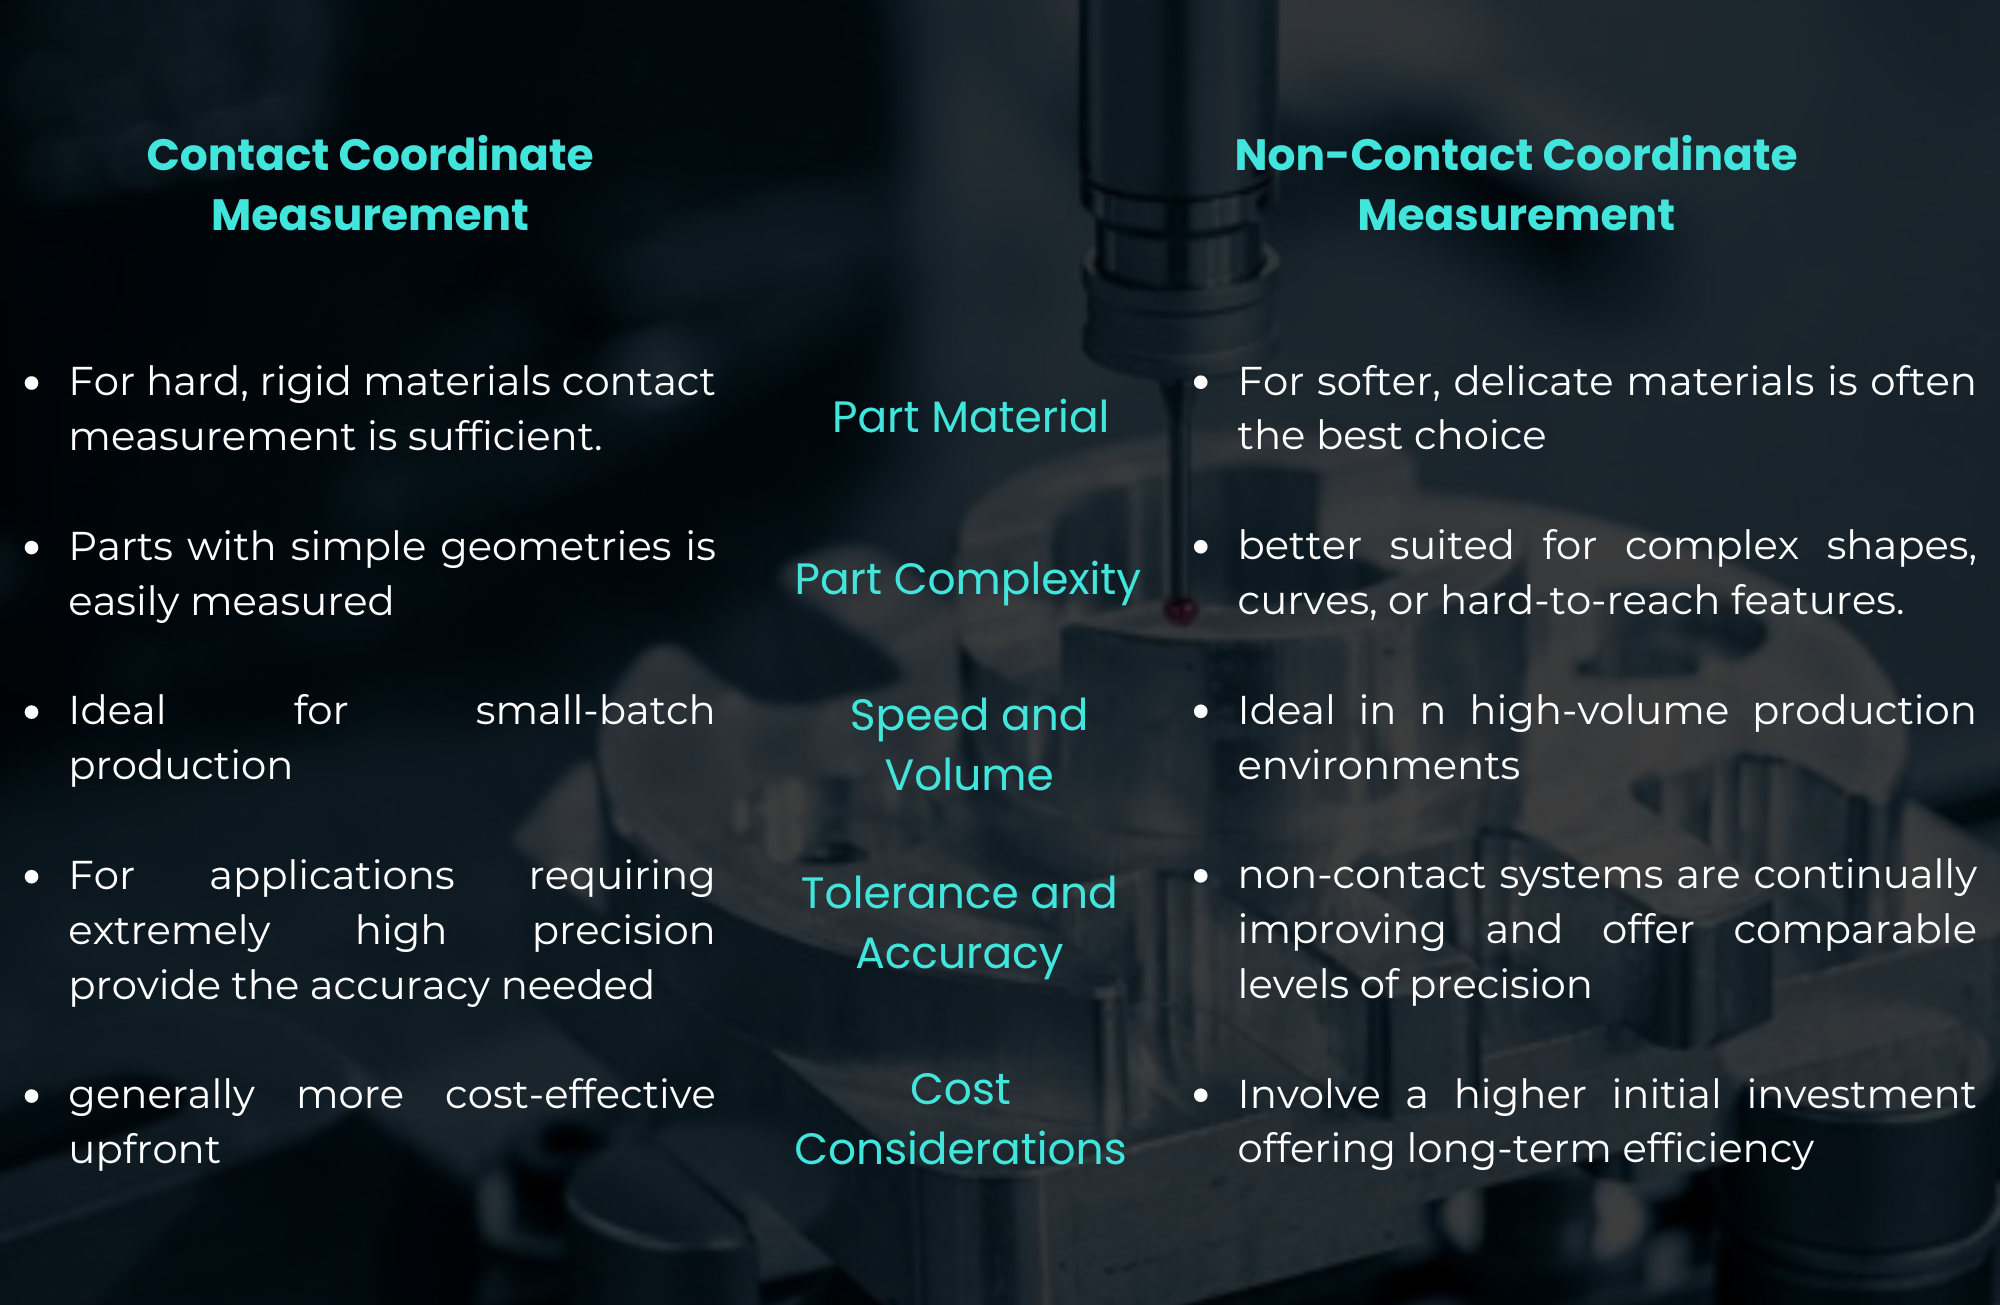
Choosing between contact and non-contact coordinate measurement depends on several factors:
- Part Material: For hard, rigid materials like metal, contact measurement may be sufficient. For softer, delicate materials like rubber, plastic, or sensitive electronics, non-contact measurement is often the best choice.
- Part Complexity: Parts with simple geometries may be easily measured using contact methods, but non-contact systems are better suited for complex shapes, curves, or hard-to-reach features.
- Speed and Volume: In high-volume production environments, non-contact systems provide faster, more efficient measurements. Contact measurement is ideal for small-batch production where speed is less critical.
- Tolerance and Accuracy: For applications requiring extremely high precision, contact methods like CMMs may provide the accuracy needed. However, non-contact systems are continually improving and can now offer comparable levels of precision for many applications.
- Cost Considerations: Contact measurement tools like CMMs are generally more cost-effective upfront, whereas non-contact systems involve a higher initial investment but offer long-term efficiency and reduced labor costs.
Both contact and non-contact coordinate measurement methods play a vital role in modern manufacturing, each suited to different types of parts, materials, and production environments. Contact measurement, with its high accuracy and reliability, remains essential for rigid, high-tolerance parts, while non-contact measurement, with its speed, efficiency, and ability to handle complex geometries, is increasingly favored in high-volume and delicate part inspections.
By carefully evaluating your production needs, materials, and accuracy requirements, you can select the right coordinate measurement method to ensure optimal quality control in your manufacturing processes.
