How to Detect Micron-Level Defects on Wide Metal Sheets PVC Lamination or Films
Published on: Oct 07, 2024

Written by: Admin
How to Detect Micron-Level Defects on Wide Metal Sheets, PVC, Lamination, or Films Using CIS Imaging Systems
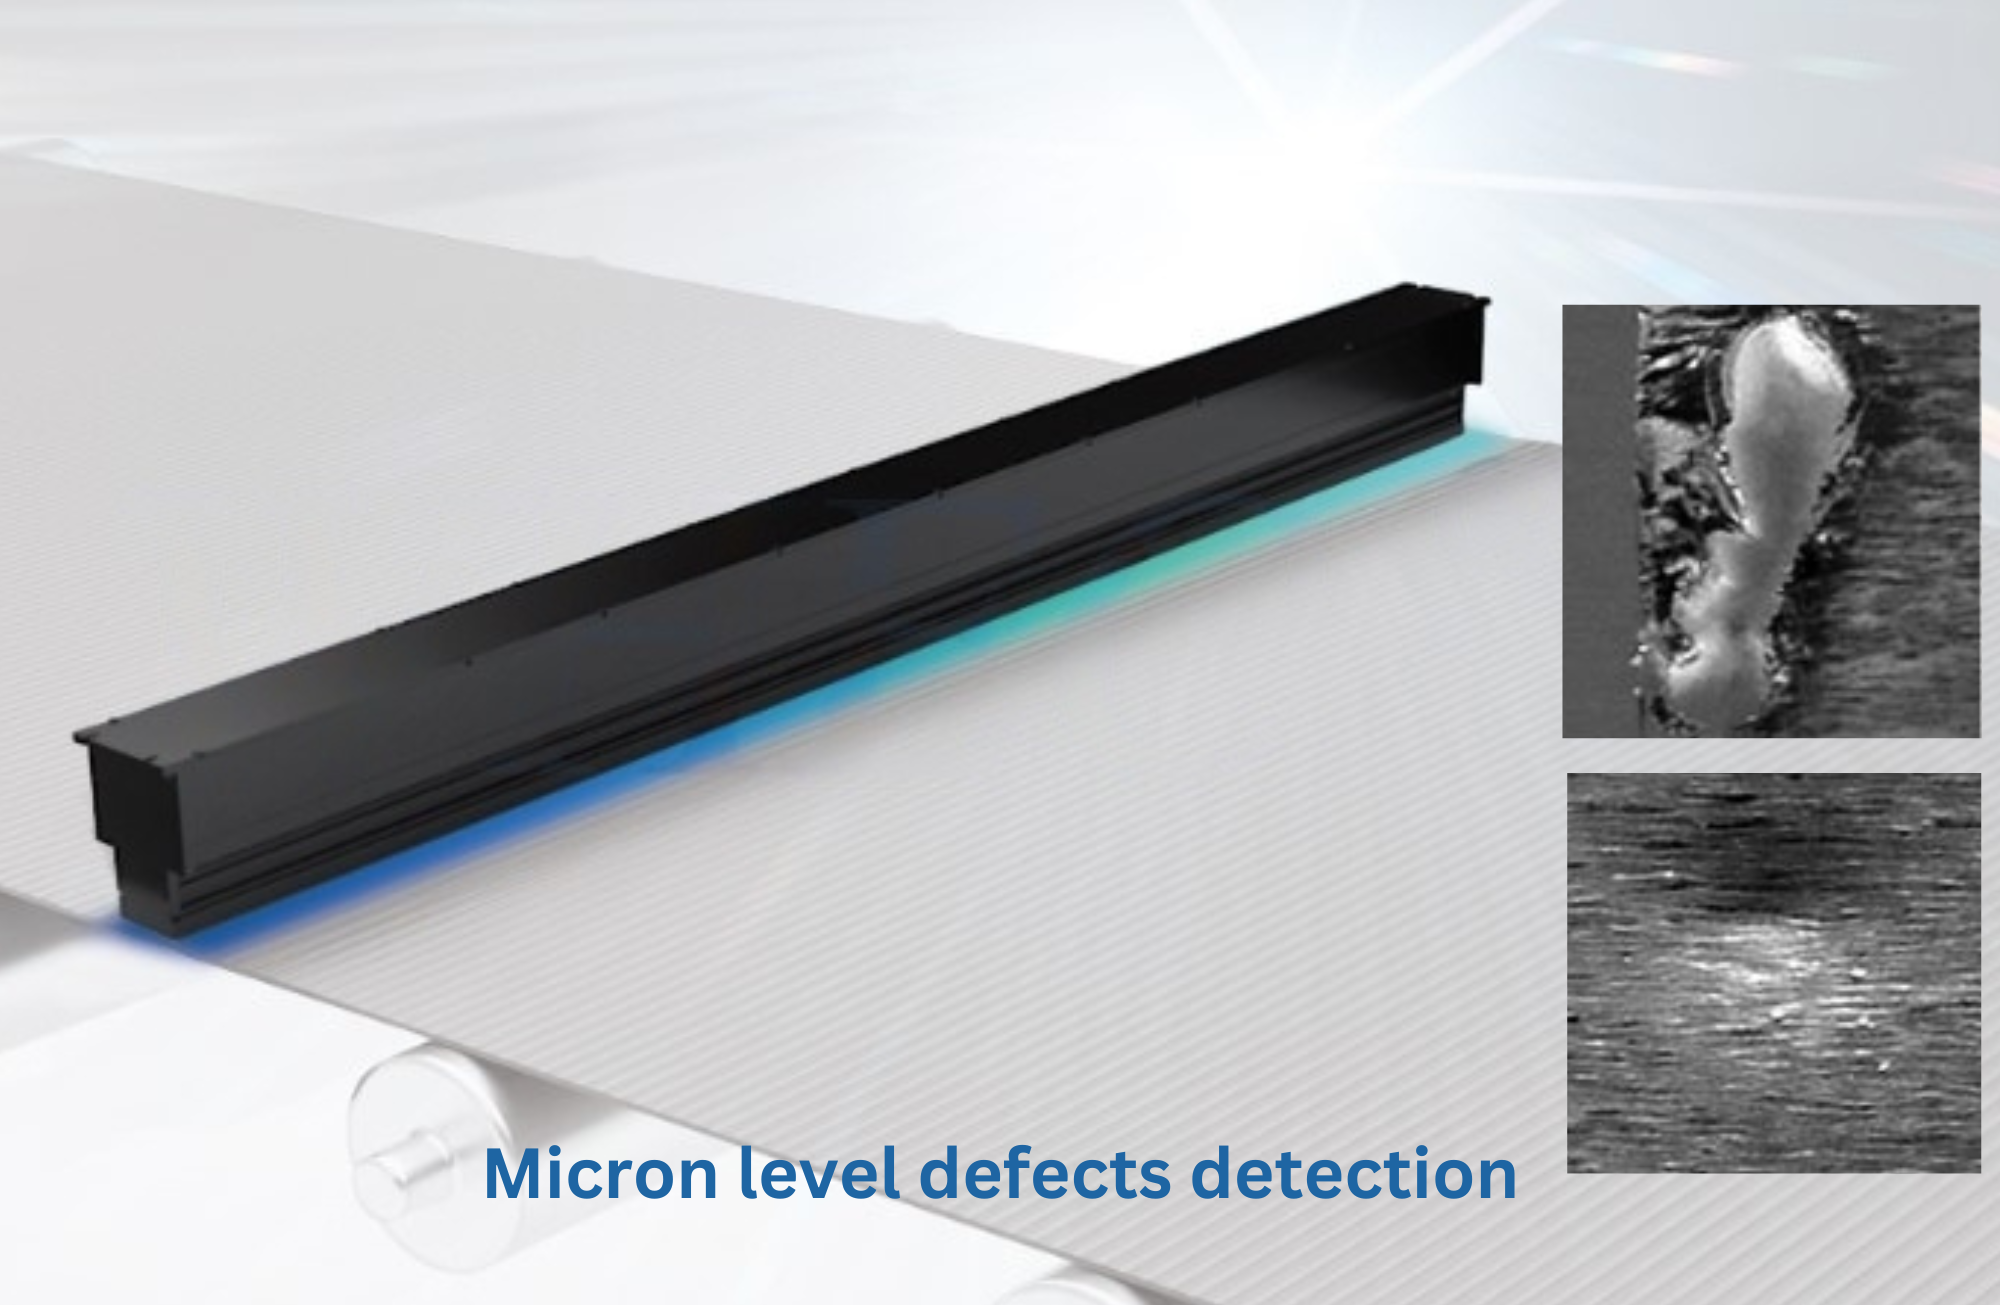
Detecting micron-level defects on large and wide surfaces, such as metal sheets, PVC, lamination, or films, is a critical task for industries that require precise quality control. Defects such as scratches, holes, patches, or surface anomalies can impact the overall performance and aesthetic quality of the product, leading to costly rejections or returns.
For industries dealing with large surfaces, manual inspection is impractical and unreliable, especially when defects can be as small as a few microns. This is where Contact Image Sensor (CIS) Imaging Systems come into play. CIS systems are designed to provide high-resolution imaging across wide surfaces, enabling real-time inspection for micron-level defect detection.
This article will explore how CIS systems work, how lighting affects detection, and how Intelgic’s Live Vision software can integrate seamlessly with CIS systems for automated defect detection.

What is a Contact Image Sensor (CIS) and How Does It Work?
A Contact Image Sensor (CIS) is a specialized imaging device commonly used for inspecting large surfaces where high-resolution imaging and precision are essential. The system works by positioning the sensor in close proximity to the surface being inspected (usually within a few millimeters), allowing it to capture high-quality, detailed images of the entire surface.
How CIS Systems Work:
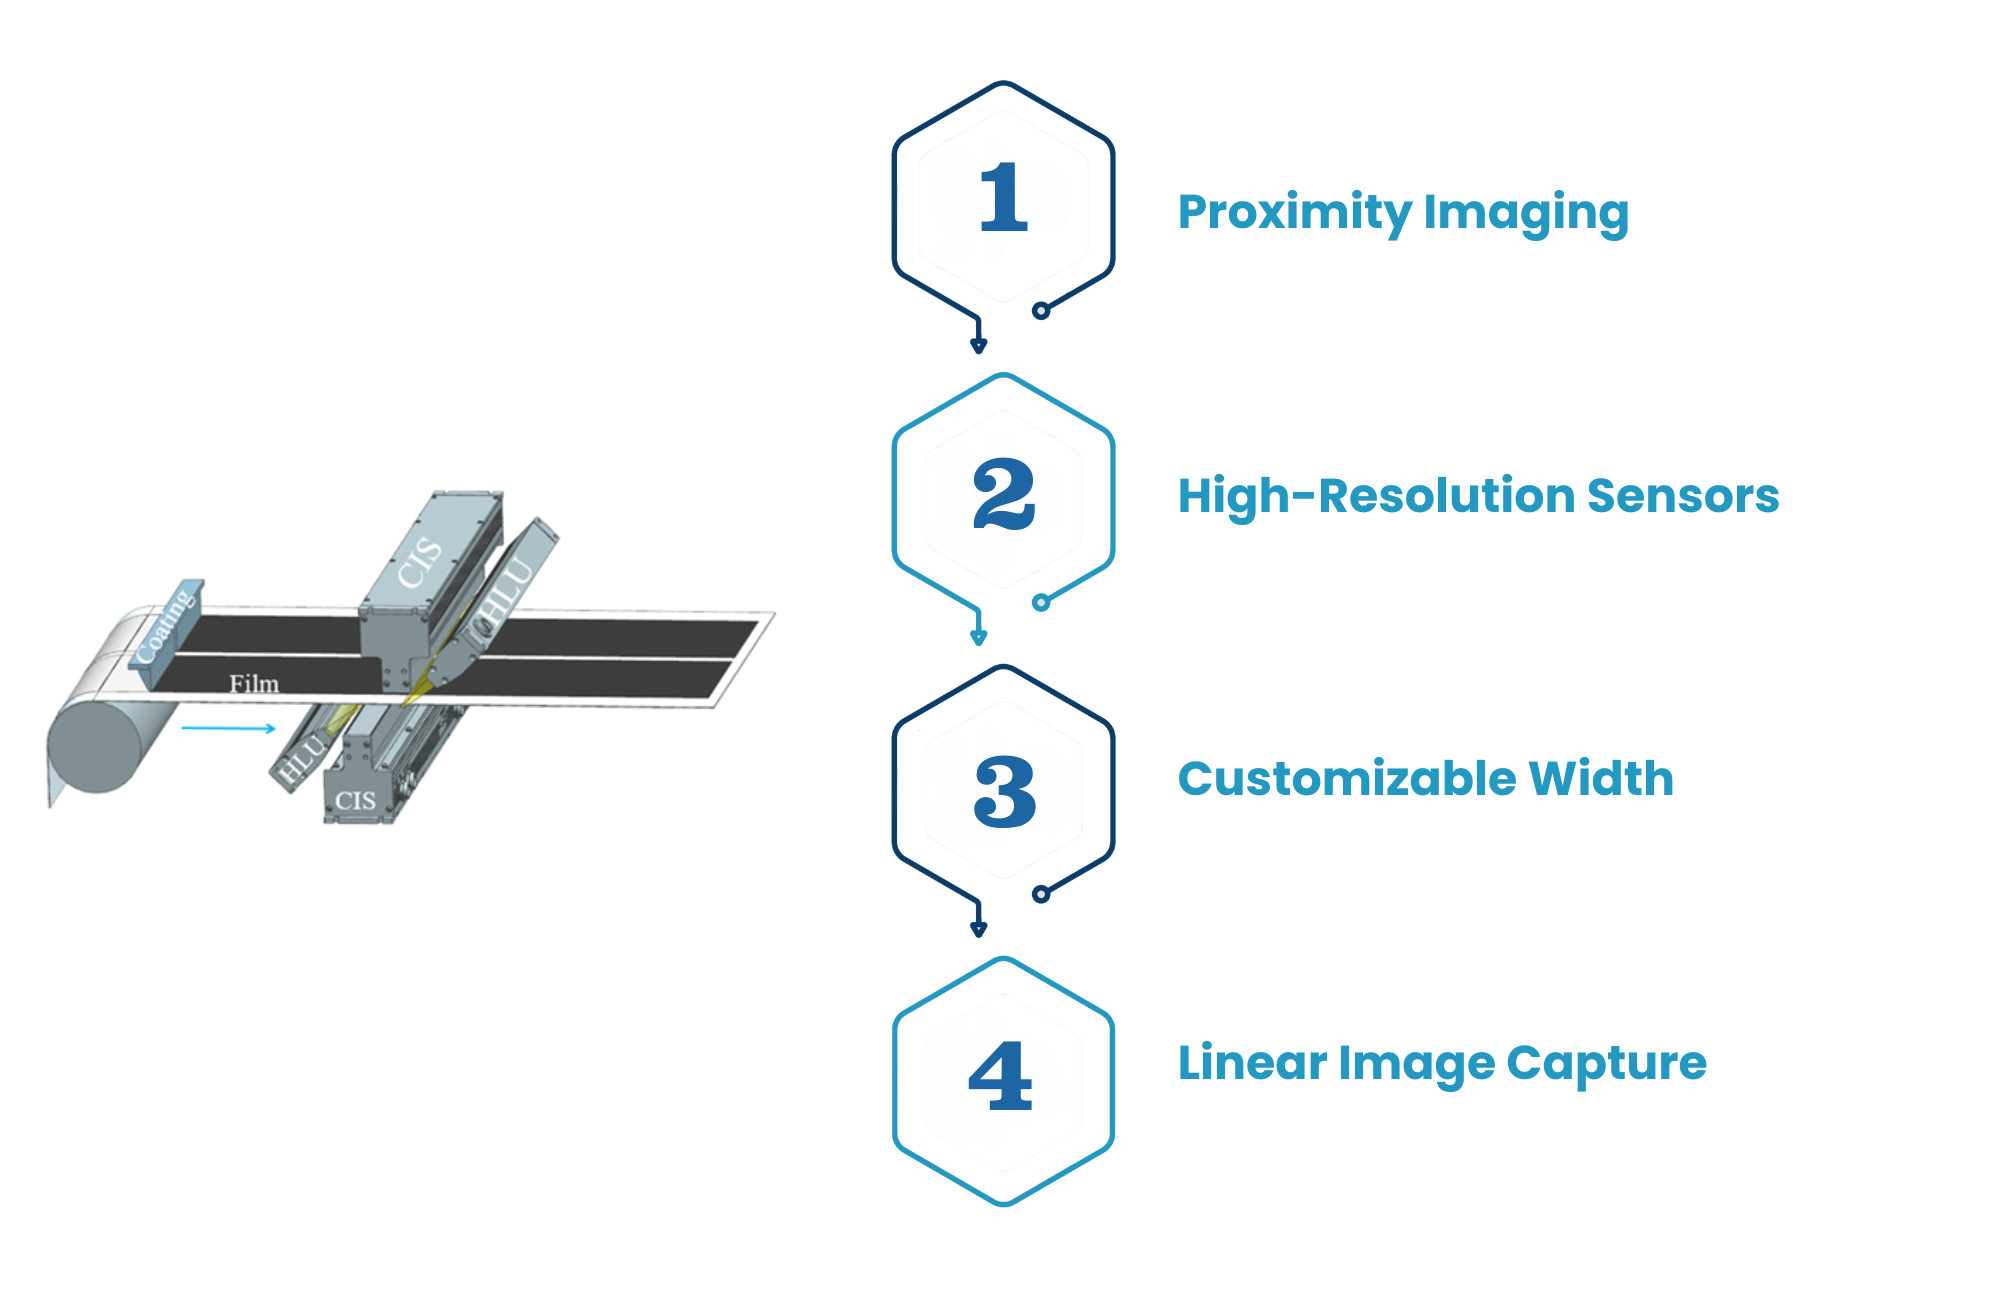
- Proximity Imaging: CIS systems are placed very close to the surface they are inspecting (often just a few millimeters). This close distance ensures that even the tiniest defects, down to a few microns, are captured clearly. The imaging sensor spans the entire width of the sheet or film being inspected, allowing for full coverage of large surfaces.
- High-Resolution Sensors: The resolution of the CIS system is determined by the dots per inch (DPI) of the sensor. The higher the DPI, the smaller the defects the system can detect. For instance, if you are aiming to detect defects as small as 0.1 mm, a 600 DPI image sensor is recommended. Higher DPI sensors are capable of capturing finer details, making it possible to detect even sub-micron level defects.
- Customizable Width: CIS systems can be customized to match the width of the metal sheet, PVC, or film being inspected. The entire width of the material is scanned as it moves along the production line, ensuring no area is missed. This is especially useful for manufacturers who produce sheets of varying sizes and need consistent inspection across their product range.
- Linear Image Capture: Unlike traditional cameras that capture images in a rectangular frame, CIS systems use linear sensors that scan the surface in a line-by-line manner. This scanning process captures a continuous image of the surface, which can be processed in real-time by AI algorithms to detect any imperfections.

The Role of Lighting in CIS Imaging Systems
Lighting plays a crucial role in the success of CIS-based inspection systems. Proper lighting helps highlight defects that might otherwise be invisible under normal conditions. Different types of defects and materials require tailored lighting conditions to ensure optimal detection accuracy.
Lighting System in CIS:
- Built-In Lighting: Most CIS systems come with built-in lighting that illuminates the surface being inspected. The angle, intensity, and type of lighting can be adjusted to suit the inspection needs. CIS systems typically use LED-based illumination, which is consistent, energy-efficient, and long-lasting.
- Adjustable Lighting Angles: The lighting system in a CIS setup can be configured to different angles depending on the material type, surface finish, and defect nature. For example, defects such as scratches or surface cracks may be more visible under angled lighting, where shadows can highlight imperfections. On the other hand, diffuse lighting may be used to inspect smooth surfaces where uniform illumination is needed to detect color inconsistencies or patches.
Factors That Affect Lighting Choice:
- Material Type: The reflectivity of the material plays a big role in lighting decisions. For reflective surfaces like metal sheets, angled lighting is often preferred to avoid glare and ensure defects like scratches or lines are clearly visible.
- Defect Nature: Different defects respond to different lighting angles. Scratches and splits, for instance, are easier to detect when the light creates a shadow effect by hitting the defect at an angle.
- Contrast Requirements: Some defects require high contrast to be detected. For example, tiny surface irregularities on a shiny metal sheet may only be visible with a high-contrast lighting setup. Adjusting the light angle and intensity can significantly improve contrast, making it easier for the CIS system to identify defects.
Intelgic’s Live Vision Software: Seamless Integration with CIS for Real-Time Defect Detection
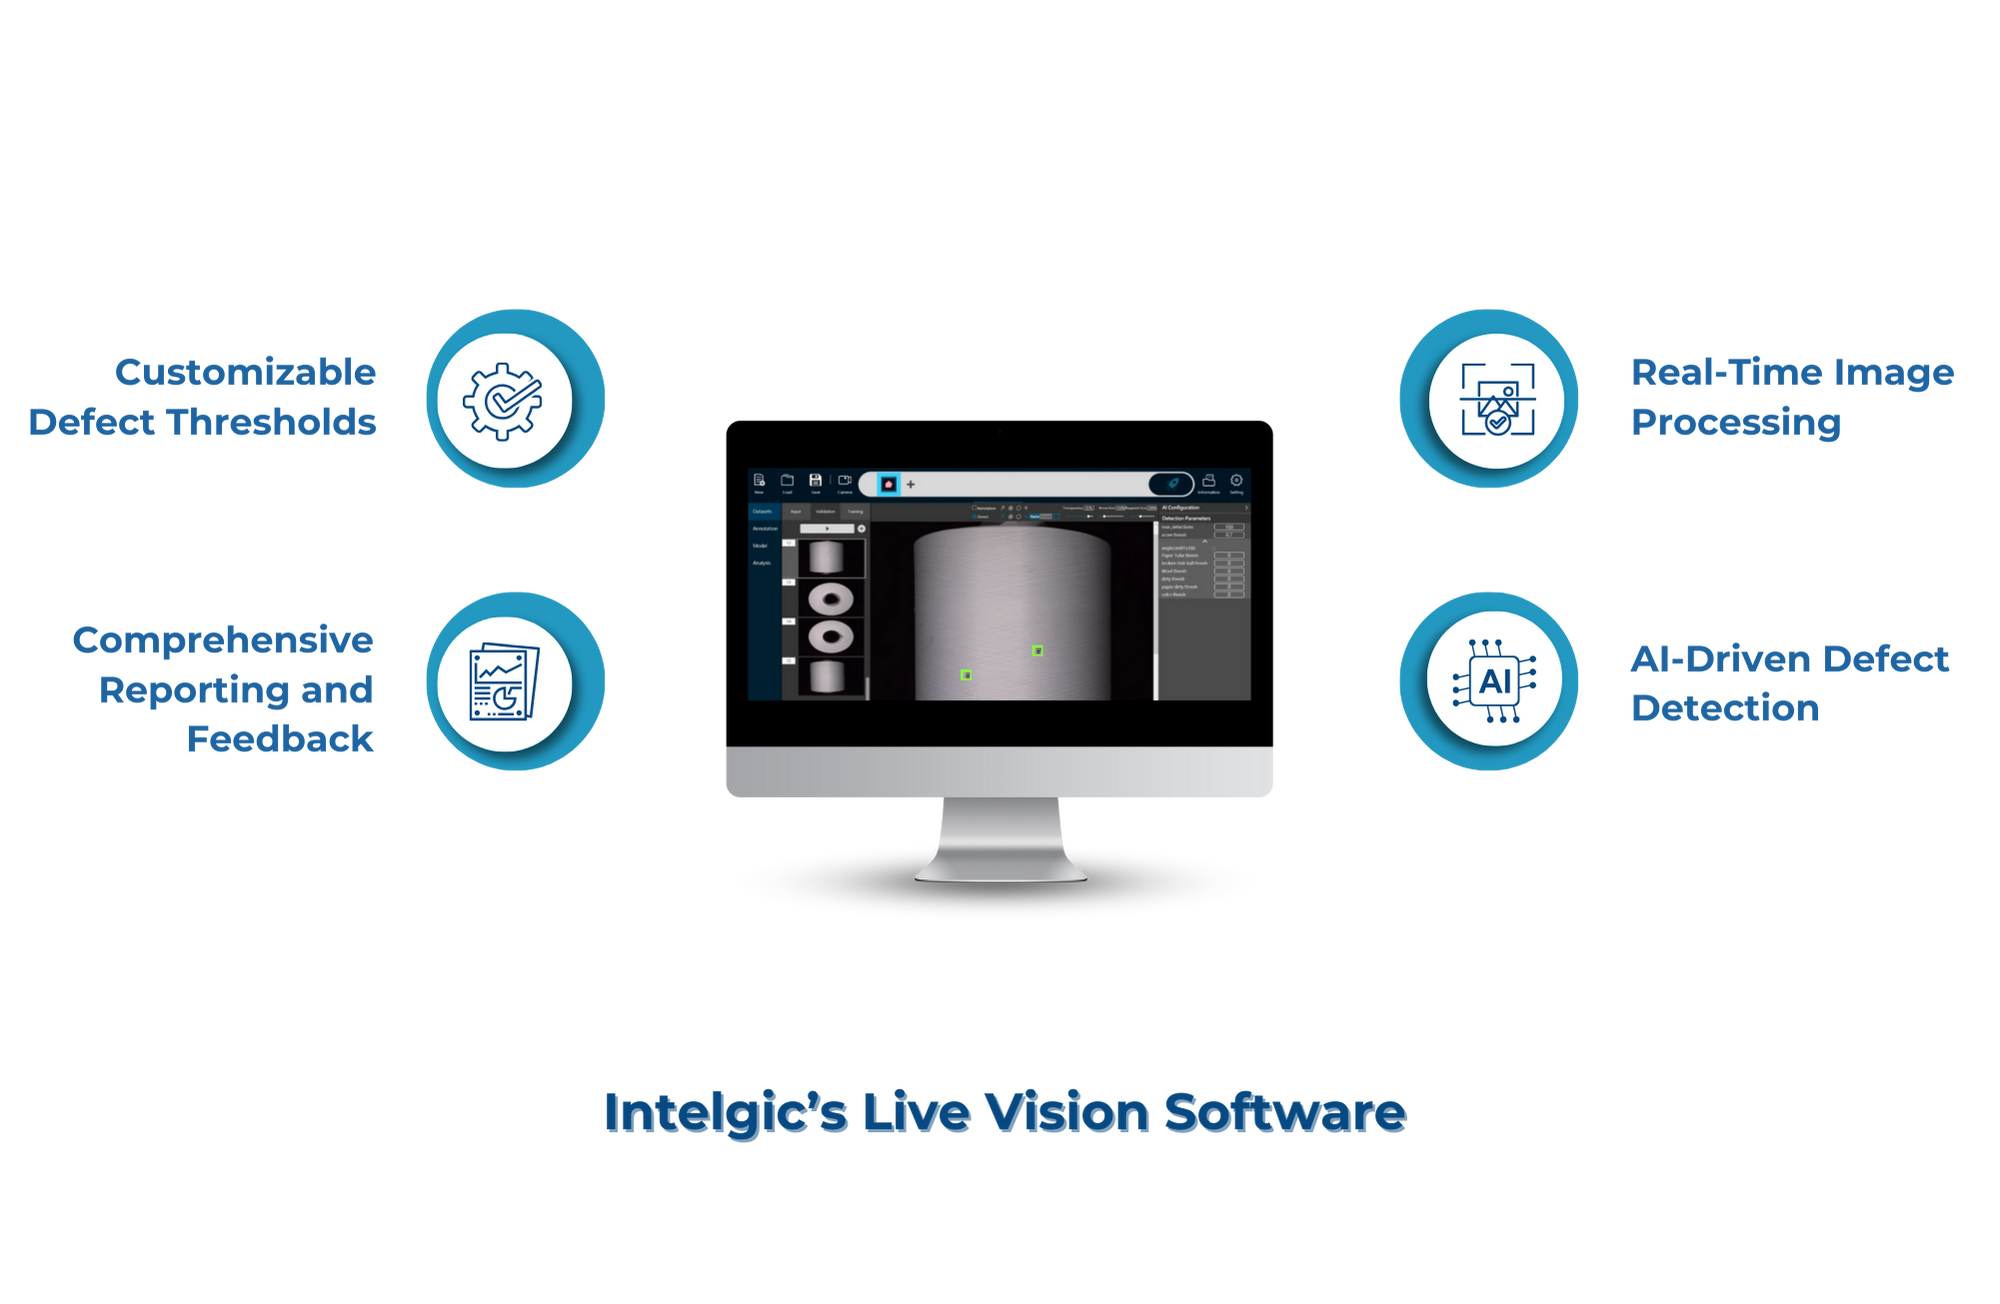
Once the CIS system captures the high-resolution images, the next step is to process those images and detect any potential defects in real-time. This is where Intelgic’s Live Vision software excels. Live Vision integrates seamlessly with CIS cameras, ensuring that the images captured by the CIS system are processed instantly, and any defects are flagged immediately.
Key Features of Intelgic’s Live Vision Software:
- Real-Time Image Processing: Live Vision processes the images as they are captured by the CIS system. This means that defects are detected in real-time, allowing manufacturers to take immediate action, whether it's rejecting defective sheets or adjusting the production process to prevent further defects.
- AI-Driven Defect Detection: The software uses advanced AI algorithms to detect micron-level defects. These algorithms are trained on various defect types—such as scratches, patches, holes, and lines—allowing the system to identify and classify defects based on predefined criteria.
- Customizable Defect Thresholds: Live Vision allows you to set different rejection thresholds for different defect types. For instance, a scratch may be acceptable if it is below 100 microns, but holes larger than 50 microns may require immediate rejection. The flexibility to customize these thresholds ensures that manufacturers maintain strict quality control while minimizing false positives.
- Comprehensive Reporting and Feedback: Live Vision provides detailed reports on the types and locations of defects detected. This data can be used to track defect trends, optimize production processes, and implement preventive measures to reduce future defects. The software also supports creating feedback loops that allow continuous improvements in product quality.

For industries that produce wide metal sheets, PVC, lamination, or films, detecting micron-level defects is critical to ensuring product quality and customer satisfaction. CIS Imaging Systems offer a powerful solution for inspecting large surfaces at high speeds, providing detailed, high-resolution images that can detect defects as small as 50 microns or less.
With customizable width and resolution options, CIS systems can be tailored to fit the specific needs of different manufacturing environments. The lighting system associated with CIS plays a pivotal role in ensuring that all defects, regardless of their type, are detected, and can be adjusted to match the material and defect nature.
Intelgic’s Live Vision software enhances the CIS system by processing images in real time and utilizing AI algorithms to detect defects with high precision. The ability to set different rejection thresholds based on defect type further ensures that the inspection process is accurate, efficient, and tailored to the manufacturer’s specific needs.
By combining CIS imaging systems with Live Vision software, manufacturers can automate their inspection processes, reduce costly returns, and improve overall product quality.

