Defect Detection using Computer Vision AI in manufacturing
Published on: Oct 21, 2024

Written by: Soumen das
Defect Detection Using Computer Vision: A Comprehensive Guide
In modern manufacturing, the quality of a product is paramount, and maintaining that quality consistently across high-speed production lines is a challenge. Traditional manual inspection methods are often prone to human error and inefficiency, especially in industries that require high precision. To address these challenges, computer vision AI-based defect detection systems have become a transformative solution. Leveraging advanced imaging technologies and machine learning algorithms, computer vision enables manufacturers to automate defect detection with higher accuracy, speed, and scalability.
Automating Visual Inspection Process for Defect Detection Using Computer Vision
Defect detection using computer vision involves the automatic identification and classification of defects in products by analyzing images or videos captured during the manufacturing process. This system leverages high-resolution cameras, image processing algorithms, and artificial intelligence (AI) to detect anomalies such as scratches, cracks, missing components, and surface inconsistencies.
The key benefits of computer vision-based defect detection include:
- Automation: Minimizes the need for human intervention in quality control processes.
- Consistency: Reduces variability caused by fatigue or subjectivity in manual inspection.
- Speed: Inspects products faster than traditional methods, increasing production throughput.
- Scalability: Adapts to the needs of various industries and can handle complex or high-volume inspection tasks.
.png)
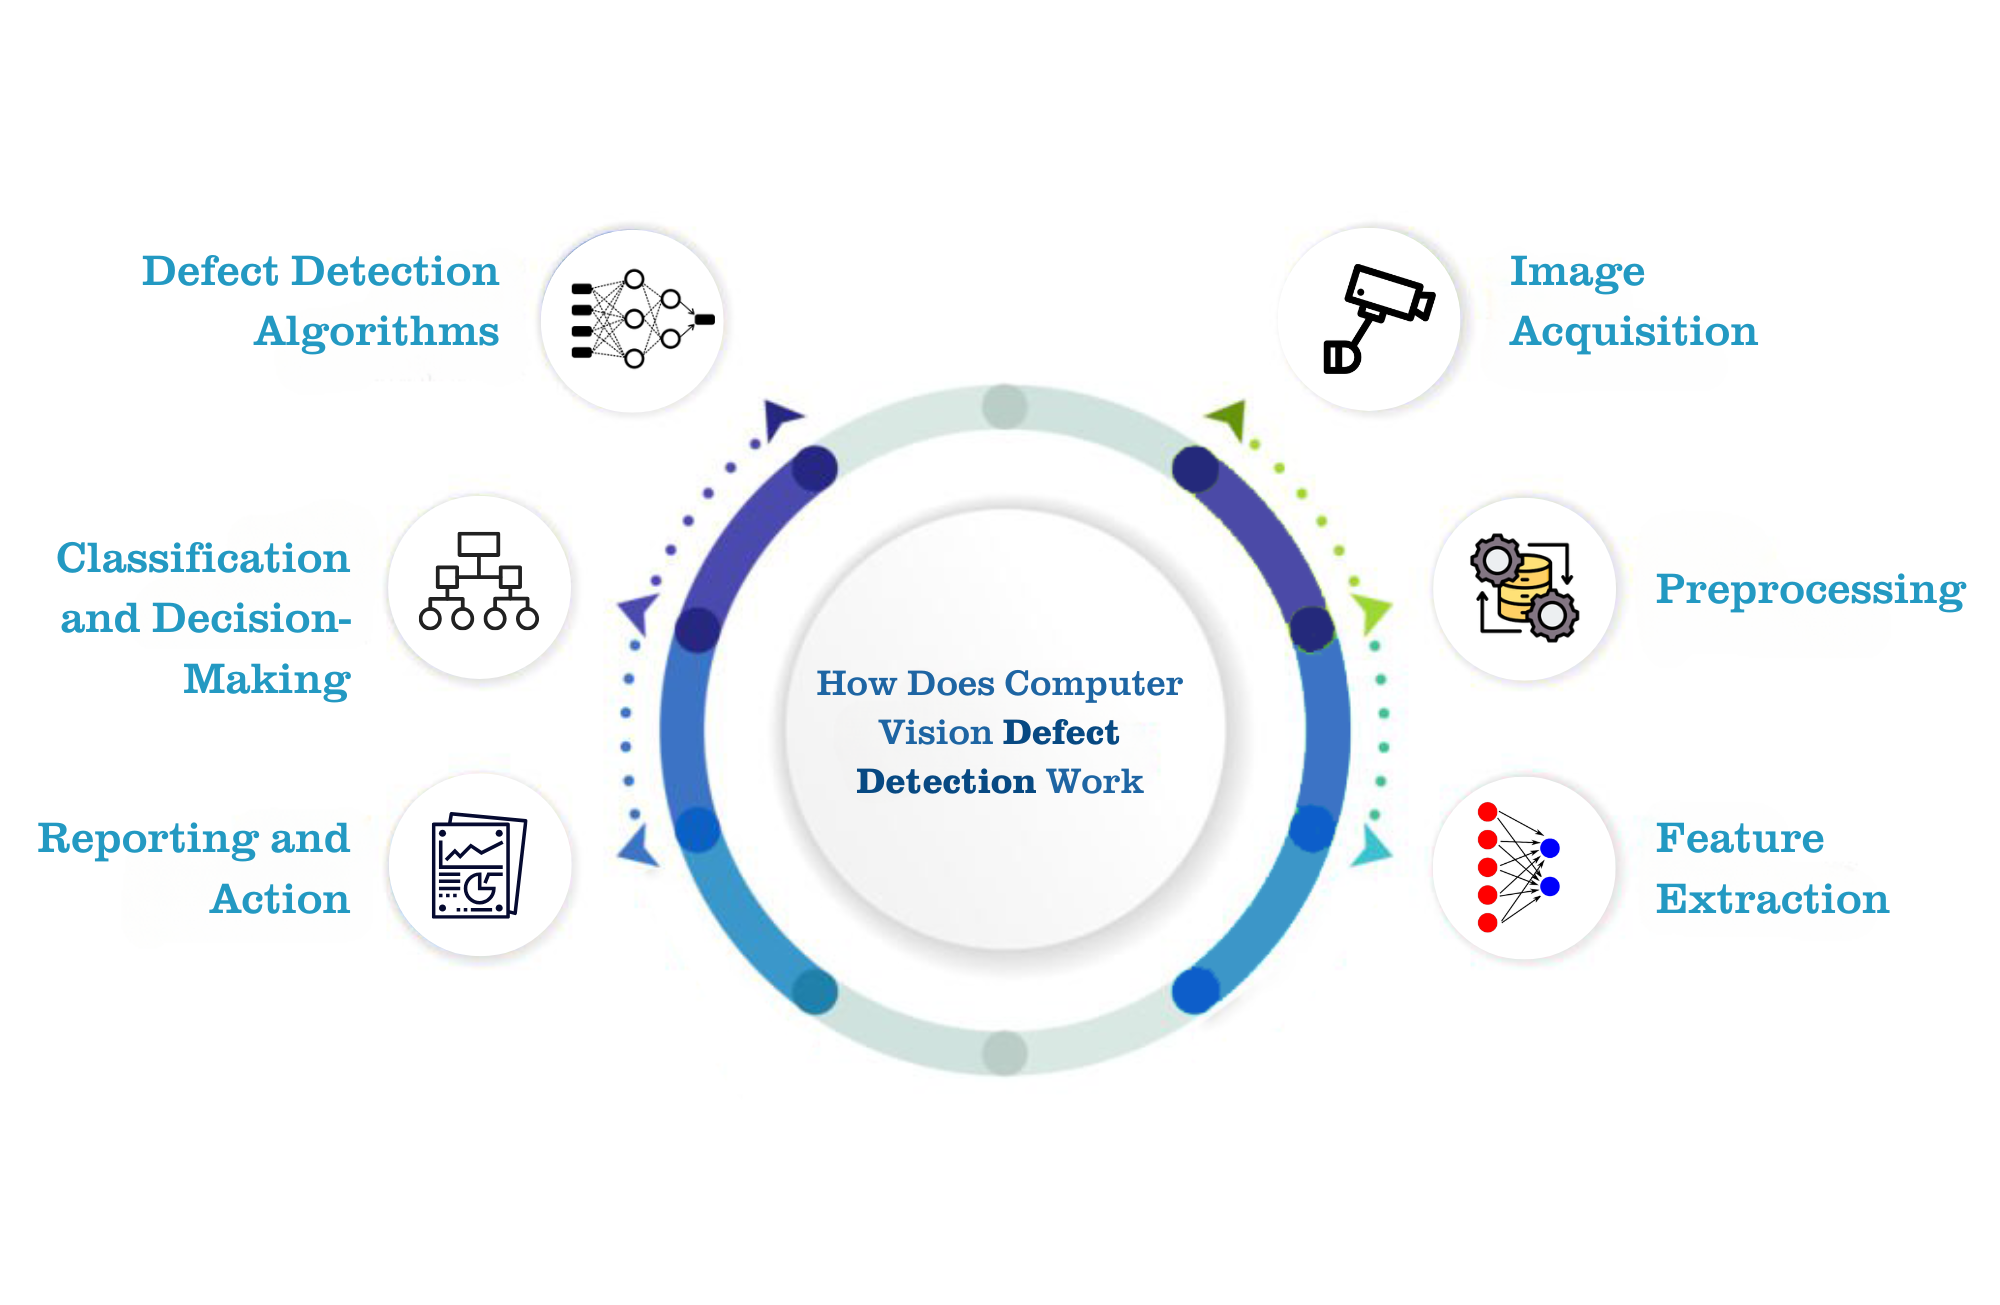
How Does Computer Vision Defect Detection Work?
Defect detection using computer vision follows a structured process involving several key steps:
- Image Acquisition: High-resolution industrial cameras capture images or video frames of the product under inspection. Different types of imaging technologies, including 2D, 3D, infrared, and X-ray imaging, may be employed depending on the application.
- Preprocessing: The captured images are enhanced using preprocessing techniques such as filtering, contrast adjustment, noise reduction, and normalization. This ensures that the images are optimized for analysis.
- Feature Extraction: The system identifies key features from the images, such as edges, textures, shapes, and colors, which are relevant to defect detection. This is done using algorithms like edge detection, histogram analysis, and other image processing techniques.
- Defect Detection Algorithms: Machine learning or deep learning models are applied to detect and classify defects. These models are typically trained on large datasets of labeled images that contain examples of both defective and non-defective products. Common techniques include:
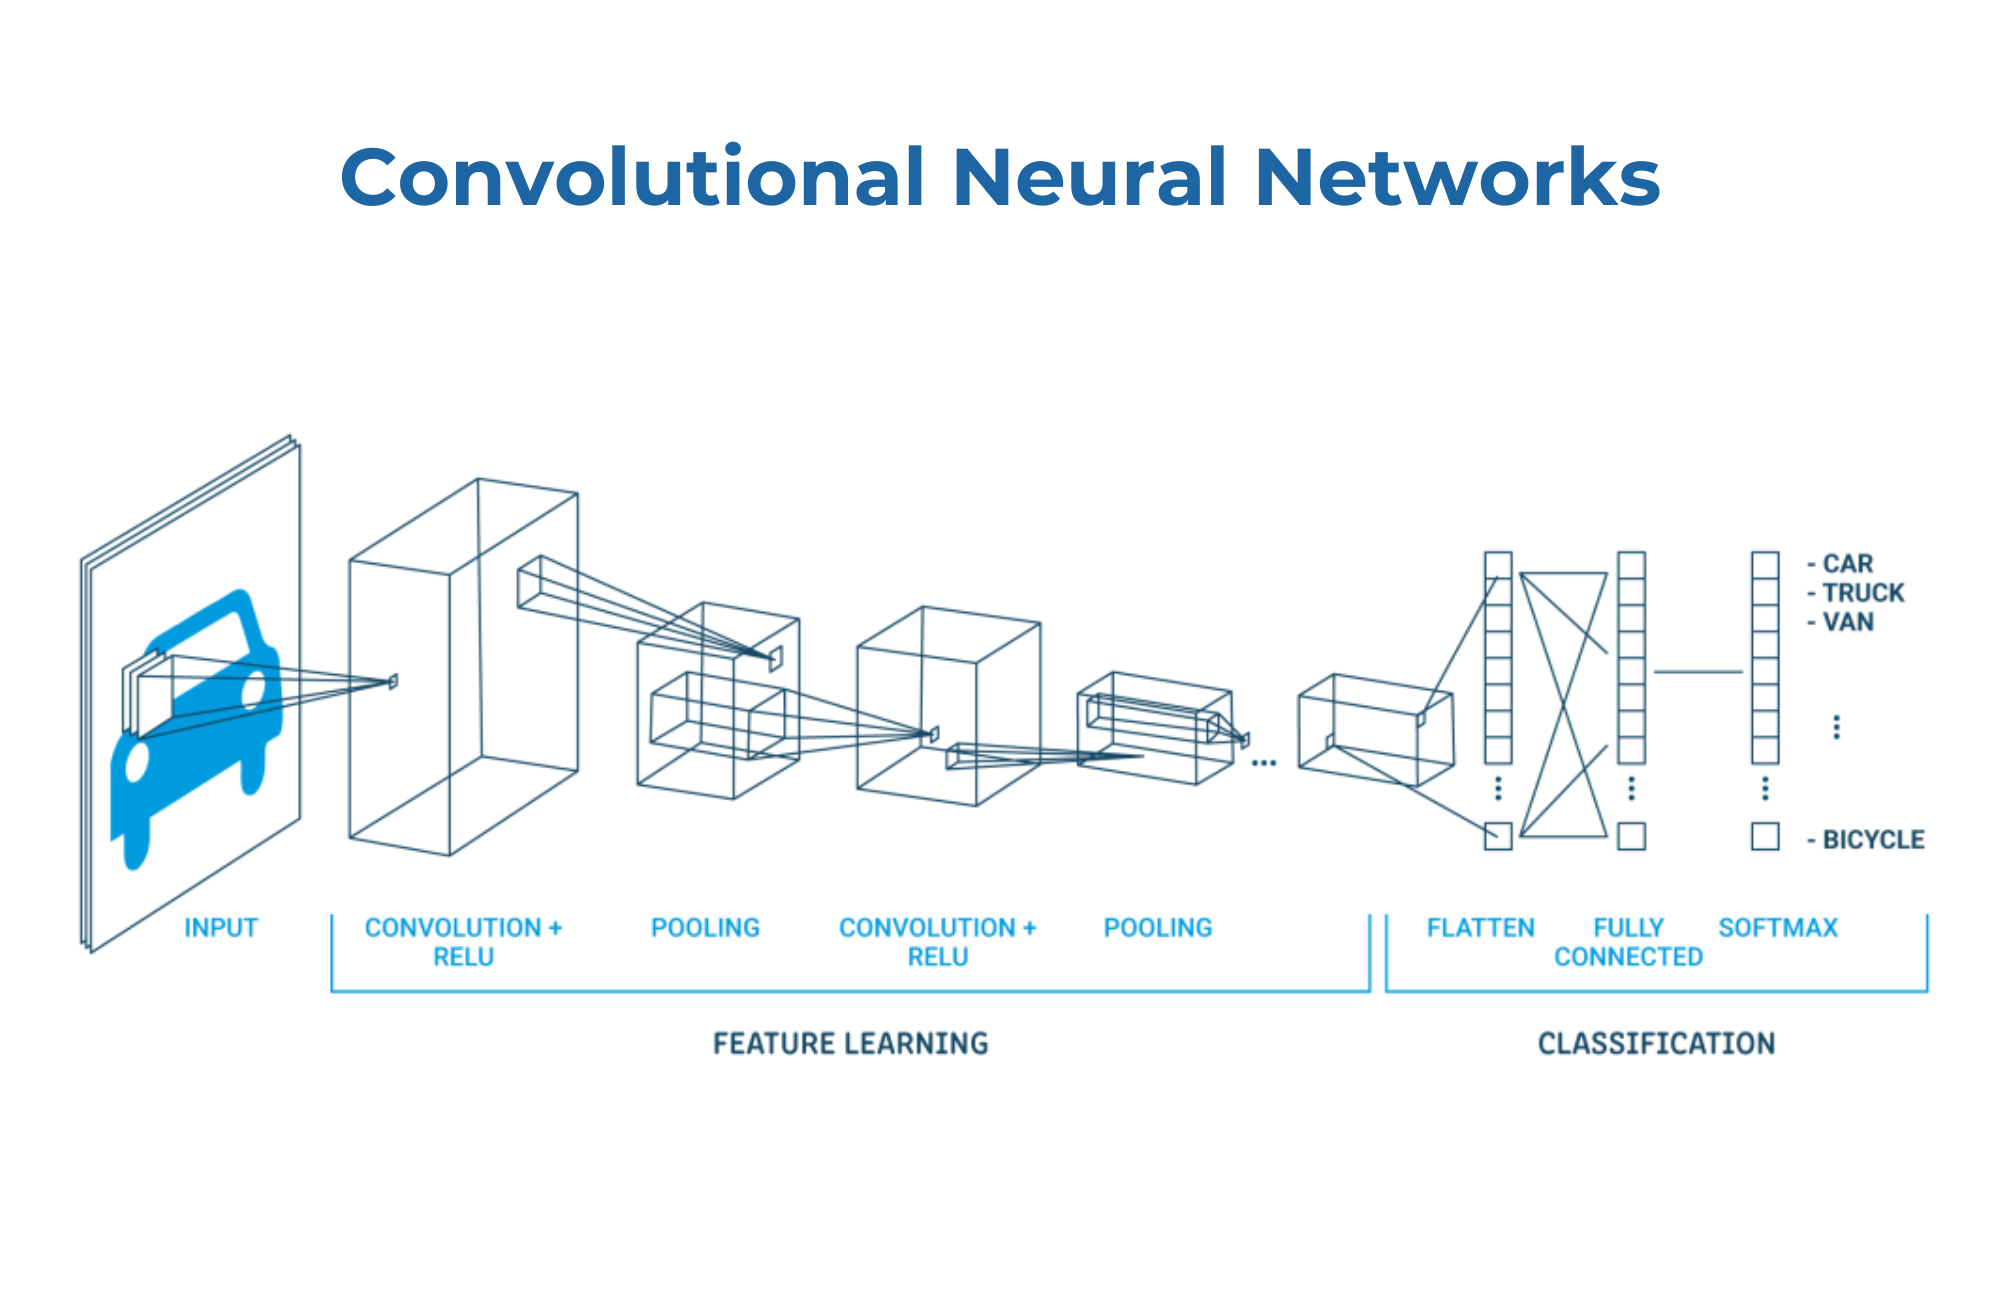
- Convolutional Neural Networks (CNNs): CNNs are widely used in defect detection due to their ability to automatically extract and learn hierarchical features from images.
- Classification and Decision-Making: Once the defects are detected, the system classifies them into different categories based on severity and type. For instance, it may identify a defect as a minor cosmetic issue or a critical flaw that requires the product to be rejected.
- Reporting and Action: The system generates real-time reports detailing the defects found and sends alerts for corrective action. Depending on the severity of the defect, the product may be rejected, reworked, or accepted based on predefined quality standards.
Key Technologies Behind Defect Detection
- Machine Vision Cameras: High-resolution cameras capture images or videos of the product surface. These cameras are often combined with specialized lighting setups to highlight specific features or defects. Technologies like hyperspectral imaging, infrared imaging, and 3D scanning are also used in certain applications.
- Deep Learning Algorithms: Deep learning algorithms, particularly convolutional neural networks (CNNs), have revolutionized defect detection by automatically learning features from large datasets. Deep learning models are capable of handling complex defect types that are difficult to detect using traditional rule-based systems.
- Edge Detection and Blob Analysis: Edge detection algorithms such as the Sobel and Canny filters help in identifying boundaries within images, which can indicate the presence of cracks or misaligned components. Blob analysis, on the other hand, helps in detecting regions of interest that stand out in terms of color or brightness.
- 3D Inspection: In some cases, 3D imaging is used to inspect the surface structure of a product. This is particularly useful for detecting height-related defects such as improper soldering on a circuit board or dents in metal parts.
- Image Segmentation: Image segmentation divides an image into multiple regions or objects, making it easier for the system to focus on relevant areas where defects may be located.
Types of Defects Detected Using Computer Vision
Computer vision can detect a wide variety of defects, some of the most common being:
- Surface Defects: Scratches, dents, pits, and cracks on the surface of metal, glass, plastic, or other materials.
- Shape or Dimension Defects: Misshapen parts or components that don’t meet dimensional specifications, such as warping or improper cuts.
- Assembly Defects: Missing, misaligned, or incorrect components in assembled products, especially in electronics or mechanical assemblies.
- Color and Texture Anomalies: Variations in color or texture that can indicate flaws in materials, printing, or coating.
- Soldering Defects: In electronics manufacturing, common soldering defects include bridges, insufficient solder, or open connections.
- Contaminants and Foreign Objects: Identifying unwanted particles, contaminants, or debris on the surface of products, such as in food or pharmaceutical manufacturing.
.png)
Applications of Computer Vision in Defect Detection
Defect detection using computer vision is widely applicable across a range of industries:
- Electronics: Computer vision systems inspect Printed Circuit Boards (PCBs) for defects such as incorrect component placement, soldering errors, and missing parts.
- Automotive: Computer vision is used to detect defects in automotive parts, such as engine components, body panels, and tires. It ensures that all parts meet stringent safety and performance standards.
- Textile: In the textile industry, computer vision inspects fabrics for defects such as tears, holes, stains, or inconsistencies in patterns or weaving.
- Metal and Steel: Computer vision systems are used to inspect metal surfaces for scratches, cracks, rust, and other surface defects in steel and metal manufacturing.
- Plastic and Packaging: Plastic parts and packaging are inspected for surface flaws, incorrect dimensions, or improper sealing.
- Semiconductor Manufacturing: In semiconductor production, computer vision inspects wafers and chips for defects such as cracks, surface irregularities, or contamination during the manufacturing process.
- Pharmaceutical: In the pharmaceutical industry, computer vision systems inspect packaging, pills, and containers for defects, ensuring that products meet strict regulatory standards.
Comparison of Computer Vision vs. Traditional Inspection Methods
In the manufacturing industry, quality control has historically relied on traditional inspection methods, which include manual inspection, mechanical tools, and various non-automated processes. While these methods have served industries for decades, they come with limitations that are increasingly being overcome by the adoption of computer vision systems. Below, we explore the key differences between traditional inspection methods and computer vision-based defect detection.
Manual Inspection
Manual inspection involves human operators visually examining products for defects or using simple mechanical tools to measure tolerances. While it has been a primary method for many industries, it has significant drawbacks:
-
Human Error: Human operators are prone to fatigue, distractions, and subjective judgment, which can result in inconsistent inspection quality. The probability of missing subtle defects or misinterpreting acceptable tolerances increases over time.
-
Speed and Efficiency: Manual inspection can be time-consuming, especially in high-volume production environments. As production speeds increase, the ability of human inspectors to keep up while maintaining accuracy diminishes.
-
Cost: The costs of manual inspection can be high due to labor expenses, particularly in large-scale manufacturing. Additionally, defective products that are missed during manual inspection can lead to costly recalls and rework.
Mechanical Inspection
Mechanical inspection methods often rely on tools like calipers, gauges, and comparators to measure physical dimensions. While these methods can ensure dimensional accuracy, they have limitations:
-
Limited Detection Capabilities: Mechanical tools are generally restricted to measuring dimensions and can miss surface defects, internal flaws, or irregularities that do not affect dimensions directly.
-
Complex Products: For more complex products with intricate designs or subtle surface flaws, mechanical methods may not offer sufficient precision or scope for comprehensive quality control.
Computer Vision-Based Inspection
Computer vision is revolutionizing the field of defect detection by offering automated, highly accurate, and scalable inspection solutions. Some of the key advantages of computer vision over traditional methods include:
-
Higher Accuracy and Consistency: Computer vision systems use high-resolution cameras and AI algorithms to detect defects with a precision that surpasses human abilities. These systems provide consistent results regardless of production speed or fatigue.
-
Speed: Automated vision systems can inspect products in real time, making them ideal for high-speed manufacturing environments where manual inspection would be too slow or cumbersome.
-
Multi-Feature Inspection: Unlike mechanical tools that focus primarily on dimensions, computer vision can detect a wide range of defects, including surface irregularities, dimensional deviations, color variations, and contamination. This versatility makes it suitable for various inspection tasks across industries.
-
Cost Efficiency: While the initial investment in computer vision systems can be high, they reduce long-term costs by minimizing defects, reducing rework, and eliminating the need for large inspection teams. The reduction in product recalls and the ability to maintain high-quality standards also leads to increased customer satisfaction.
-
Real-Time Feedback and Data: Computer vision systems can provide instant feedback, allowing manufacturers to make quick adjustments on the production line. Additionally, they collect detailed inspection data that can be analyzed to improve quality processes over time.
The Role of Deep Learning in Defect Detection
Deep learning has emerged as a transformative technology in computer vision-based defect detection, enabling machines to automatically learn and improve their performance over time. At the core of this transformation are Convolutional Neural Networks (CNNs), a specific type of deep learning algorithm tailored to image recognition tasks. Let’s explore the critical role deep learning plays in defect detection.
How Deep Learning Works in Defect Detection
Deep learning models, particularly CNNs, function by mimicking the neural pathways of the human brain. Unlike traditional algorithms that rely on manually defined rules and features, deep learning models learn directly from raw image data. They automatically extract and learn hierarchical patterns and features that help identify defects. Here’s how deep learning enhances defect detection:
-
Feature Extraction: Traditional image processing relies on predefined features such as edges, contours, or color thresholds to detect defects. Deep learning, however, automatically learns these features during the training phase. This allows the model to identify more subtle and complex defects, even those that are difficult to define with traditional methods.
-
Self-Learning: As deep learning models are exposed to more data, they improve over time. With every new example, the model refines its understanding of what constitutes a defect and reduces false positives or missed defects.
-
Robustness: Deep learning models are robust and adaptable to different environments, lighting conditions, and product variations. This flexibility makes them ideal for complex manufacturing environments where product characteristics or defect types may change.
-
Handling Complex Defects: Defects that are hard to identify, such as texture anomalies, microscopic cracks, or multi-dimensional defects, are better detected with deep learning because these models capture and analyze intricate patterns in the image data.
Applications of Deep Learning in Defect Detection
-
Semiconductor Manufacturing: In semiconductor inspection, deep learning helps detect microscopic defects on wafers or chips that are invisible to the naked eye, ensuring that only defect-free components make it to the next production stage.
-
Automotive: Deep learning models inspect automotive parts for surface defects, assembly issues, and dimensional inaccuracies, ensuring each component meets stringent safety and performance standards.
-
Textile Industry: In textiles, deep learning models inspect fabric patterns, colors, and textures to detect inconsistencies like holes, loose threads, or color deviations.
Surface Inspection Using Computer Vision
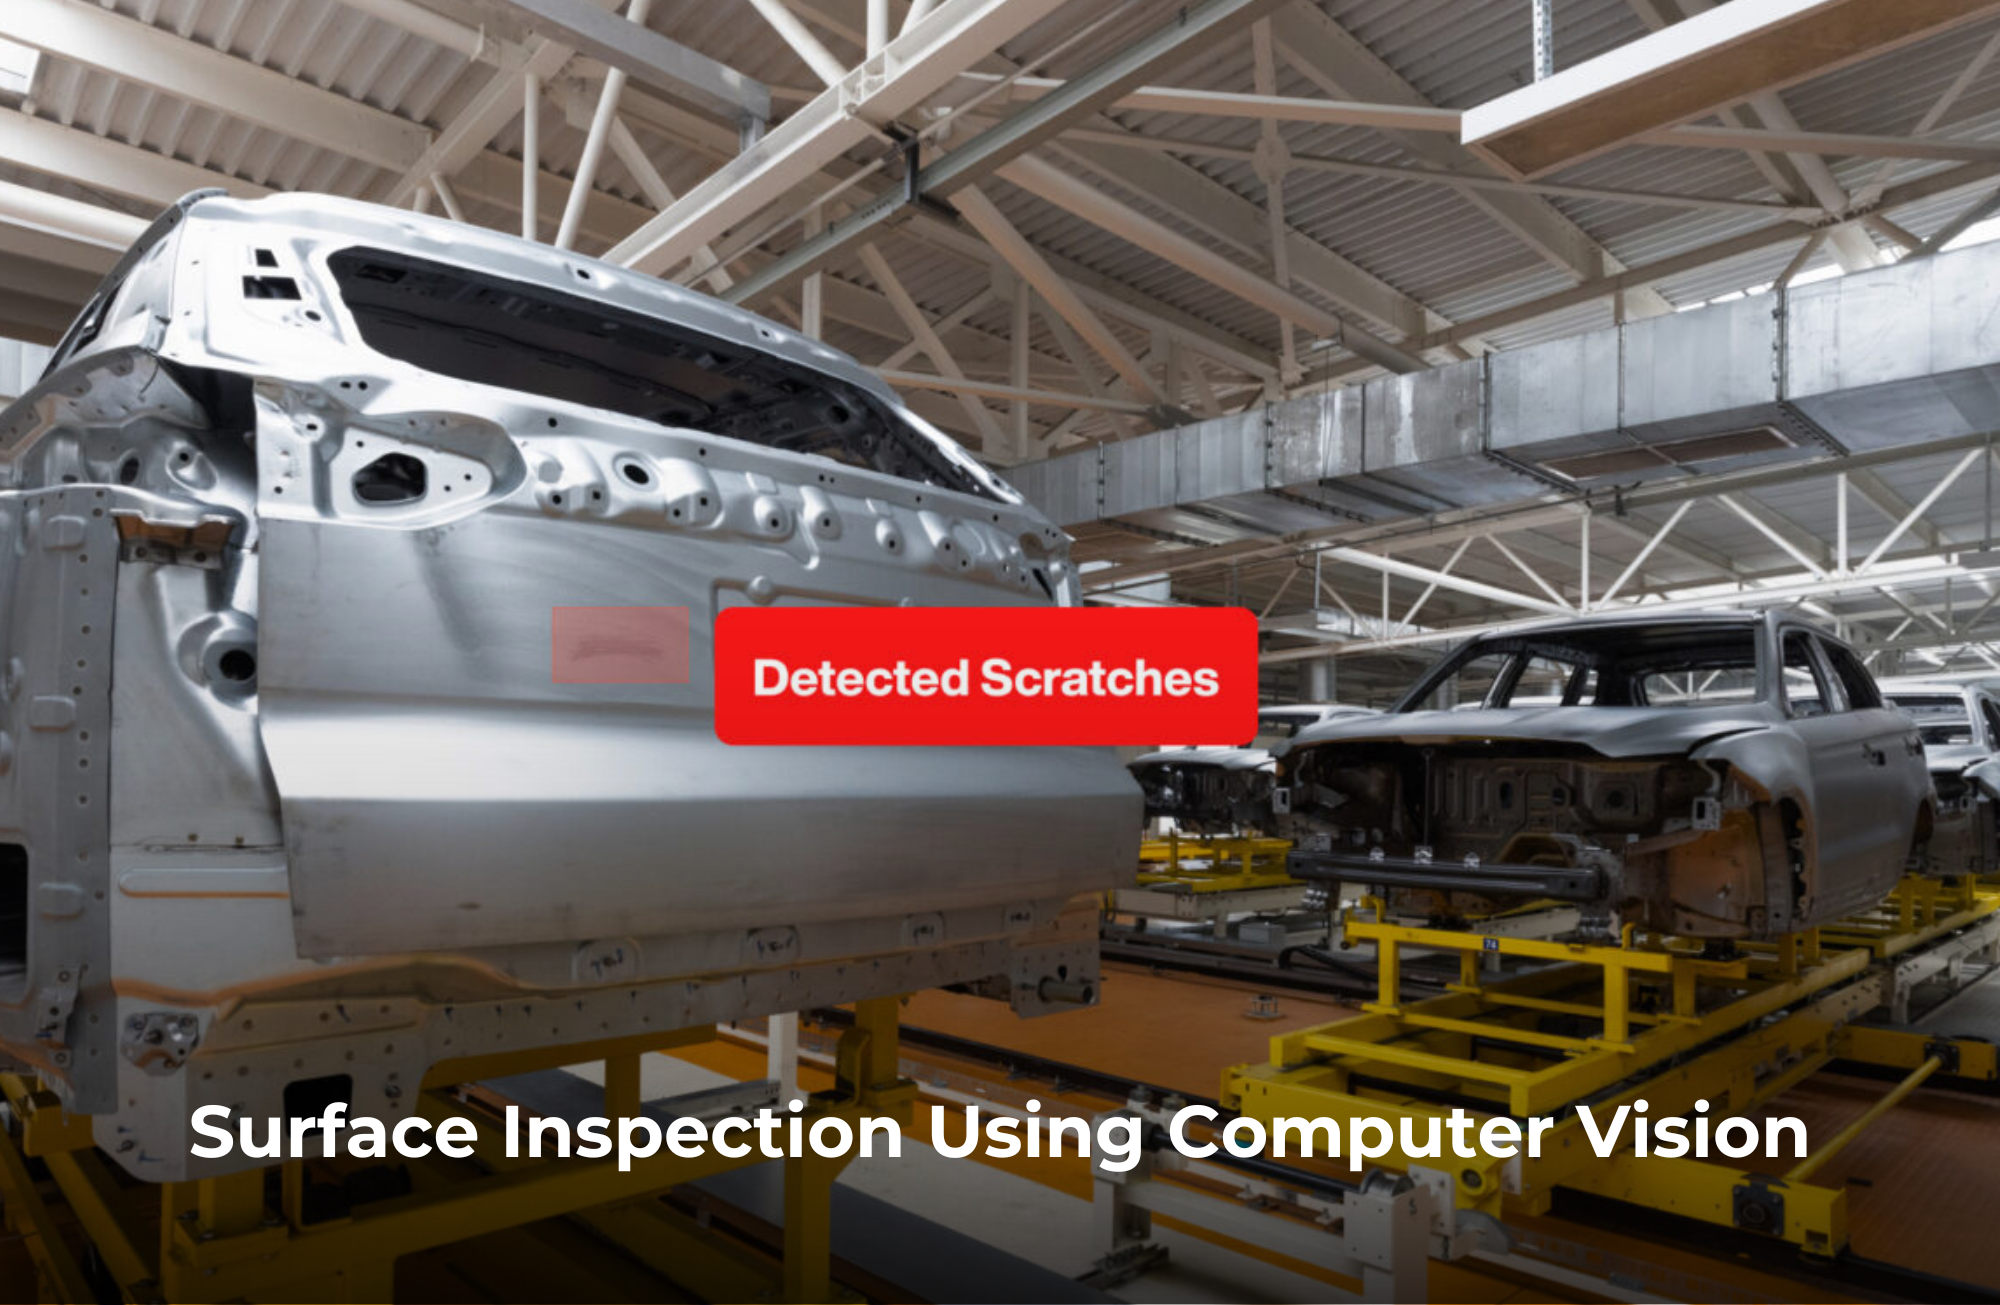
Surface inspection is a critical component of quality control in many industries, where even small defects can impact product functionality or aesthetic appeal. Computer vision has revolutionized surface inspection by enabling automated, high-speed, and highly accurate detection of surface defects that manual inspection or mechanical methods may miss.
How Surface Inspection Works
In surface inspection, computer vision systems capture high-resolution images of a product's surface, using advanced lighting setups to highlight potential defects. Algorithms process these images to detect surface anomalies, such as:
-
Scratches and Dents: Common in industries like metal, steel, and automotive, scratches and dents can impact product integrity. Computer vision systems are adept at detecting even fine scratches invisible to the naked eye.
-
Discoloration: In industries like textiles and packaging, color consistency is critical. Computer vision algorithms can detect subtle color changes, ensuring uniformity across products.
-
Surface Contaminants: In industries like food processing and pharmaceuticals, foreign particles or contamination on a product's surface can lead to safety concerns. Vision systems detect and flag these contaminants instantly.
-
Texture Variations: In materials like wood or textiles, texture consistency is vital. Surface inspection systems identify areas where textures deviate from specifications.
Industries Using Surface Inspection
-
Metal and Steel Manufacturing: Surface quality is critical in the production of steel, aluminum, and other metals. Computer vision inspects for cracks, corrosion, and other surface-level defects, ensuring durability and quality.
-
Plastic Manufacturing: Plastic components used in automotive or consumer goods require smooth surfaces, free from cracks or voids. Vision systems can spot even the smallest imperfections.
-
Textile Industry: Textile surface inspection is crucial for identifying weaving flaws, holes, or irregularities in patterns and textures, ensuring product quality for fabrics or garments.
Metal Parts Inspection Using Computer Vision
Metal parts play a crucial role in various industries, including automotive, aerospace, and heavy machinery. Defects in metal parts, whether they are surface-level imperfections or internal flaws, can lead to product failure, reduced lifespan, or compromised safety. Computer vision has transformed metal parts inspection by automating and enhancing the precision of quality checks.
How Metal Parts Inspection Works
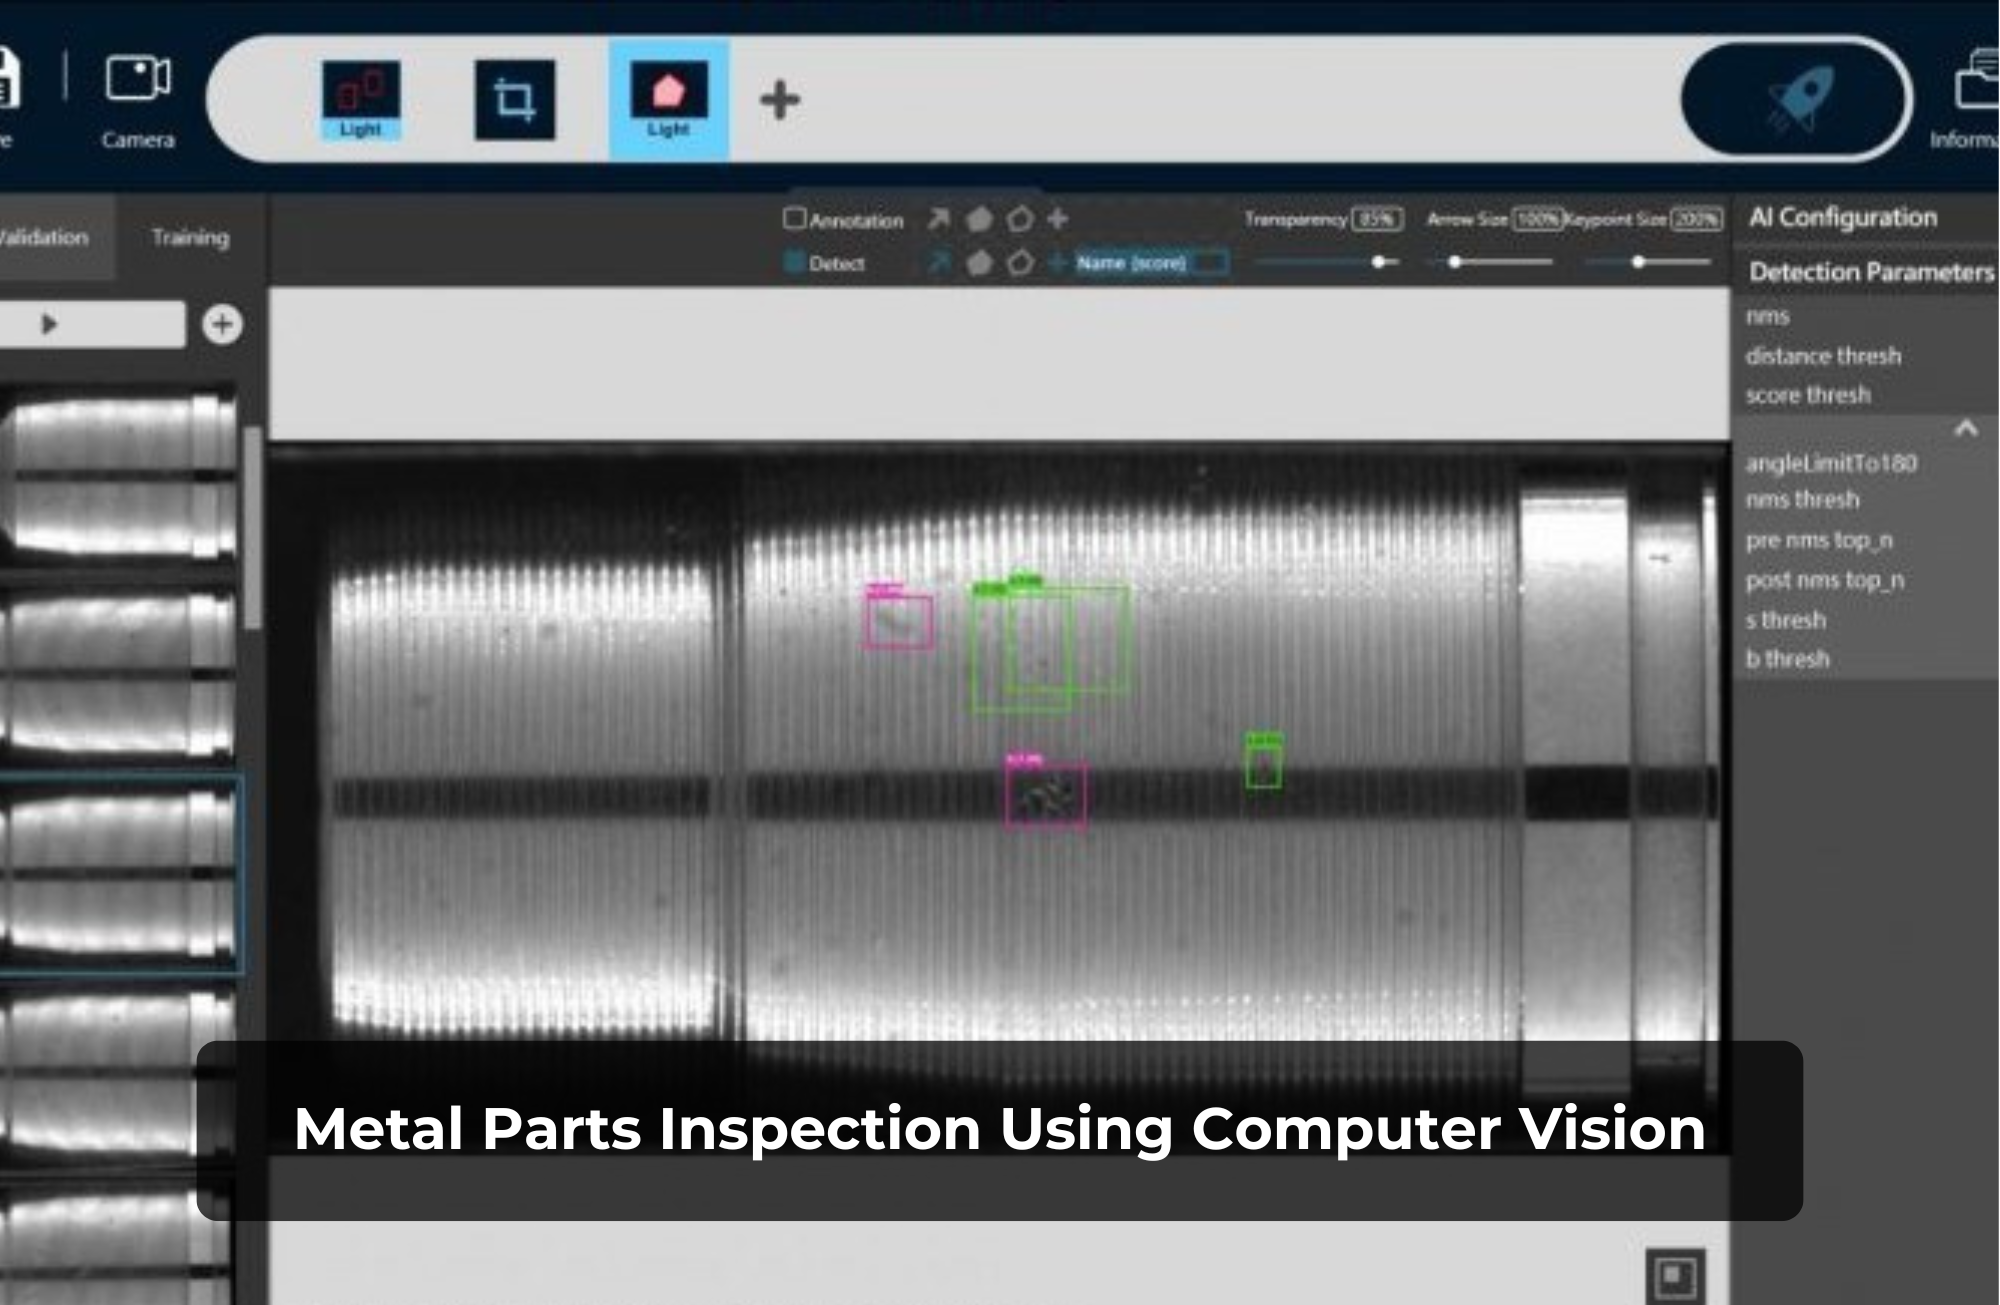
In metal parts inspection, computer vision systems typically combine high-resolution cameras with specialized lighting to detect surface defects, dimensional inaccuracies, and even internal issues. Key steps include:
-
Dimensional Inspection: Metal parts need to adhere to precise dimensions for correct assembly and functionality. Computer vision systems measure these dimensions with high accuracy, ensuring that parts meet tight tolerances.
-
Surface Inspection: Metal parts are prone to surface defects such as scratches, corrosion, and pits. Computer vision detects these defects using edge detection, contrast analysis, and texture recognition techniques.
-
Weld Inspection: In industries like automotive and aerospace, weld quality is crucial for ensuring structural integrity. Computer vision systems inspect welds for cracks, incomplete fusion, or porosity, guaranteeing that the welds meet safety standards.
-
Internal Defects: In some cases, computer vision systems can integrate with non-destructive testing methods like X-ray or infrared imaging to detect internal defects in metal parts, such as voids, cracks, or inclusions.
Applications of Metal Parts Inspection
-
Automotive Industry: Metal parts used in engine components, transmission systems, and body structures are inspected for defects to ensure safety and reliability.
-
Aerospace: Metal parts used in aircraft structures or engines undergo rigorous inspection to detect even the smallest flaws that could compromise safety or performance.
-
Heavy Machinery: Metal parts used in heavy machinery must be inspected for dimensional accuracy and surface quality to ensure they can withstand the stresses of industrial use.
The Future of Computer Vision in Defect Detection
The future of defect detection using computer vision is being shaped by several technological advancements:
- AI and Machine Learning Integration: As machine learning models become more advanced, defect detection systems will become better at identifying subtle or complex defects. Deep learning algorithms can continue to learn from new data, improving their accuracy over time.
- Edge Computing: By processing data closer to the source (e.g., directly on the manufacturing line), edge computing can reduce latency and enable real-time defect detection without relying on cloud computing.
- Augmented Reality (AR): AR could be used to overlay defect information directly onto the product or machinery, providing operators with real-time visual feedback on the defects identified.
- IoT and Data Analytics: The integration of computer vision with the Internet of Things (IoT) and data analytics will allow manufacturers to gather detailed insights into defect trends, helping to optimize production processes and prevent defects before they occur.
Intelgic's Robust and Customizable Defect Detection System
Intelgic offers a cutting-edge computer vision-based defect detection system powered by advanced AI algorithms and machine learning. Intelgic’s solution is fully customizable to meet the specific needs of various industries, including metal and steel, textiles, automotive, plastics, semiconductors, and many others. Here’s why Intelgic stands out:
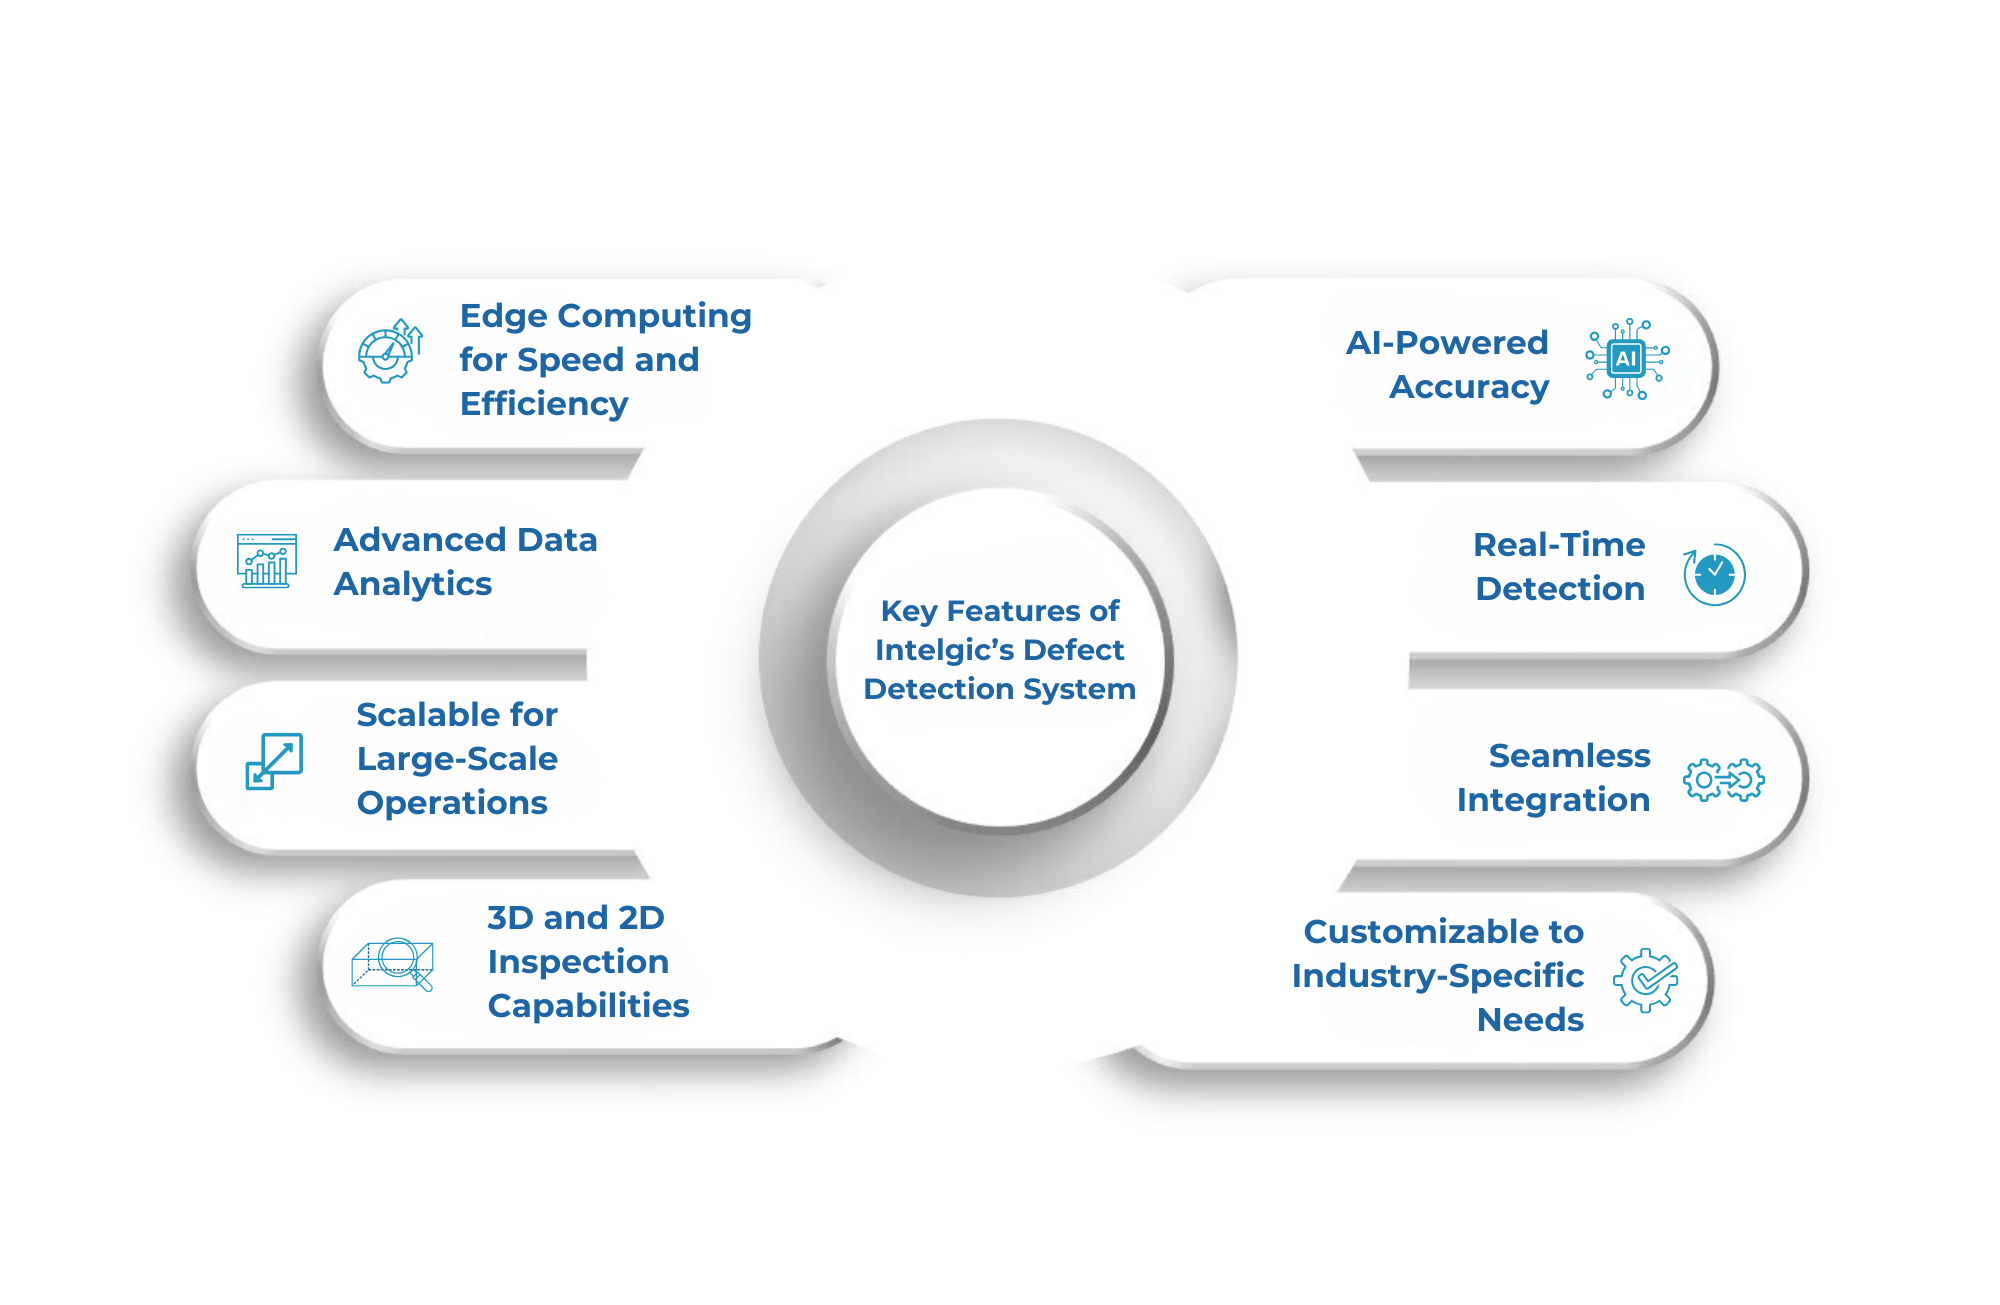
Key Features of Intelgic’s Defect Detection System
- AI-Powered Accuracy: Intelgic’s system uses state-of-the-art AI algorithms to identify defects with exceptional precision, even those that are difficult to detect with traditional inspection methods. The system continuously learns and adapts to new defect patterns, reducing the chances of missed errors or false positives.
- Real-Time Detection: The system processes images in real-time, allowing for immediate detection and reporting of defects. This helps manufacturers respond quickly to issues, minimizing production downtime and preventing defective products from progressing down the line.
- Seamless Integration: Intelgic’s solution easily integrates with existing manufacturing infrastructure, including cameras, lighting systems, and Programmable Logic Controllers (PLCs). This ensures a smooth transition and reduces the need for significant alterations to existing workflows.
- Customizable to Industry-Specific Needs: Intelgic’s defect detection system is fully customizable to meet the unique demands of various industries, such as automotive, metal and steel, textiles, packaging, electronics, pharmaceuticals, and more. The system can be tailored to detect specific types of defects based on product characteristics and industry standards.
- 3D and 2D Inspection Capabilities: Intelgic’s system supports both 2D and 3D vision technologies, providing a comprehensive inspection process that captures surface, shape, and dimensional defects. This flexibility allows manufacturers to inspect both flat and complex, multi-dimensional products.
- Scalable for Large-Scale Operations: Whether you have a small production line or a large manufacturing facility, Intelgic’s solution can scale to meet your production needs. The system is designed to handle high-volume inspections without sacrificing speed or accuracy.
- Advanced Data Analytics: Intelgic’s system not only detects defects but also provides valuable insights through data analytics. The system captures data on defect trends, production issues, and inspection outcomes, which can be used to improve processes, reduce waste, and optimize quality control strategies.
- Edge Computing for Speed and Efficiency: Intelgic incorporates edge computing into its defect detection system, ensuring fast data processing at the source of inspection. This reduces latency, enables real-time decision-making, and minimizes reliance on cloud-based processing.
Why Choose Intelgic’s Defect Detection Solution?
Intelgic’s AI-driven defect detection system offers manufacturers a modern, highly adaptable, and effective solution for automating quality control. Here’s why Intelgic is the ideal choice for industries looking to enhance their inspection processes:
- Higher Precision, Less Rework: With Intelgic’s cutting-edge AI algorithms, manufacturers can achieve higher precision in defect detection, reducing the need for costly rework and ensuring that only high-quality products reach the market.
- Reduced Costs and Increased Efficiency: By automating the inspection process, Intelgic’s system helps manufacturers reduce labor costs, increase throughput, and minimize material waste.
- Improved Product Quality and Compliance: Intelgic’s system ensures that products meet strict quality standards and regulatory requirements, making it easier for manufacturers to maintain consistent quality and avoid non-compliance issues.
- Faster Time-to-Market: With faster and more efficient defect detection, manufacturers can reduce production bottlenecks, enabling quicker time-to-market for new products.
- Custom Solutions for Unique Challenges: Intelgic understands that each industry has its own set of challenges. The company works closely with clients to customize its defect detection system to meet specific product requirements and manufacturing environments.
Intelgic’s AI-powered and fully customizable defect detection system offers manufacturers an advanced solution for achieving high precision, real-time inspection, and scalable integration with existing workflows. By choosing Intelgic’s system, manufacturers can enhance their production efficiency, improve product quality, and reduce operational costs—all while staying ahead in a competitive market.
Whether you’re in automotive, electronics, textiles, or any other manufacturing sector, Intelgic’s defect detection system is designed to help you achieve the highest standards of quality and operational excellence.
Defect detection using computer vision is transforming the manufacturing landscape by automating quality control processes, reducing human error, and ensuring consistent product quality. From surface defects in metal and steel to intricate component inspections in electronics, computer vision systems are proving to be invaluable across a wide range of industries.
